CONTENTS
- Step 1: Access the Key Map Panel
- Step 2: Map Drum Articulations to MIDI Keys
- Step 3: Mapping Grooves to MIDI Notes
- Step 4: Advanced Mapping Options & Velocity Splits
- Step 5: Save Your Custom Key Map
Step 1: Access the Key Map Panel
To begin, open BFD3 and navigate to the Key Map panel by clicking the "Key Map" button in the main navigation bar. This panel provides a comprehensive view of all existing MIDI mappings and is where you will modify or create new mappings. 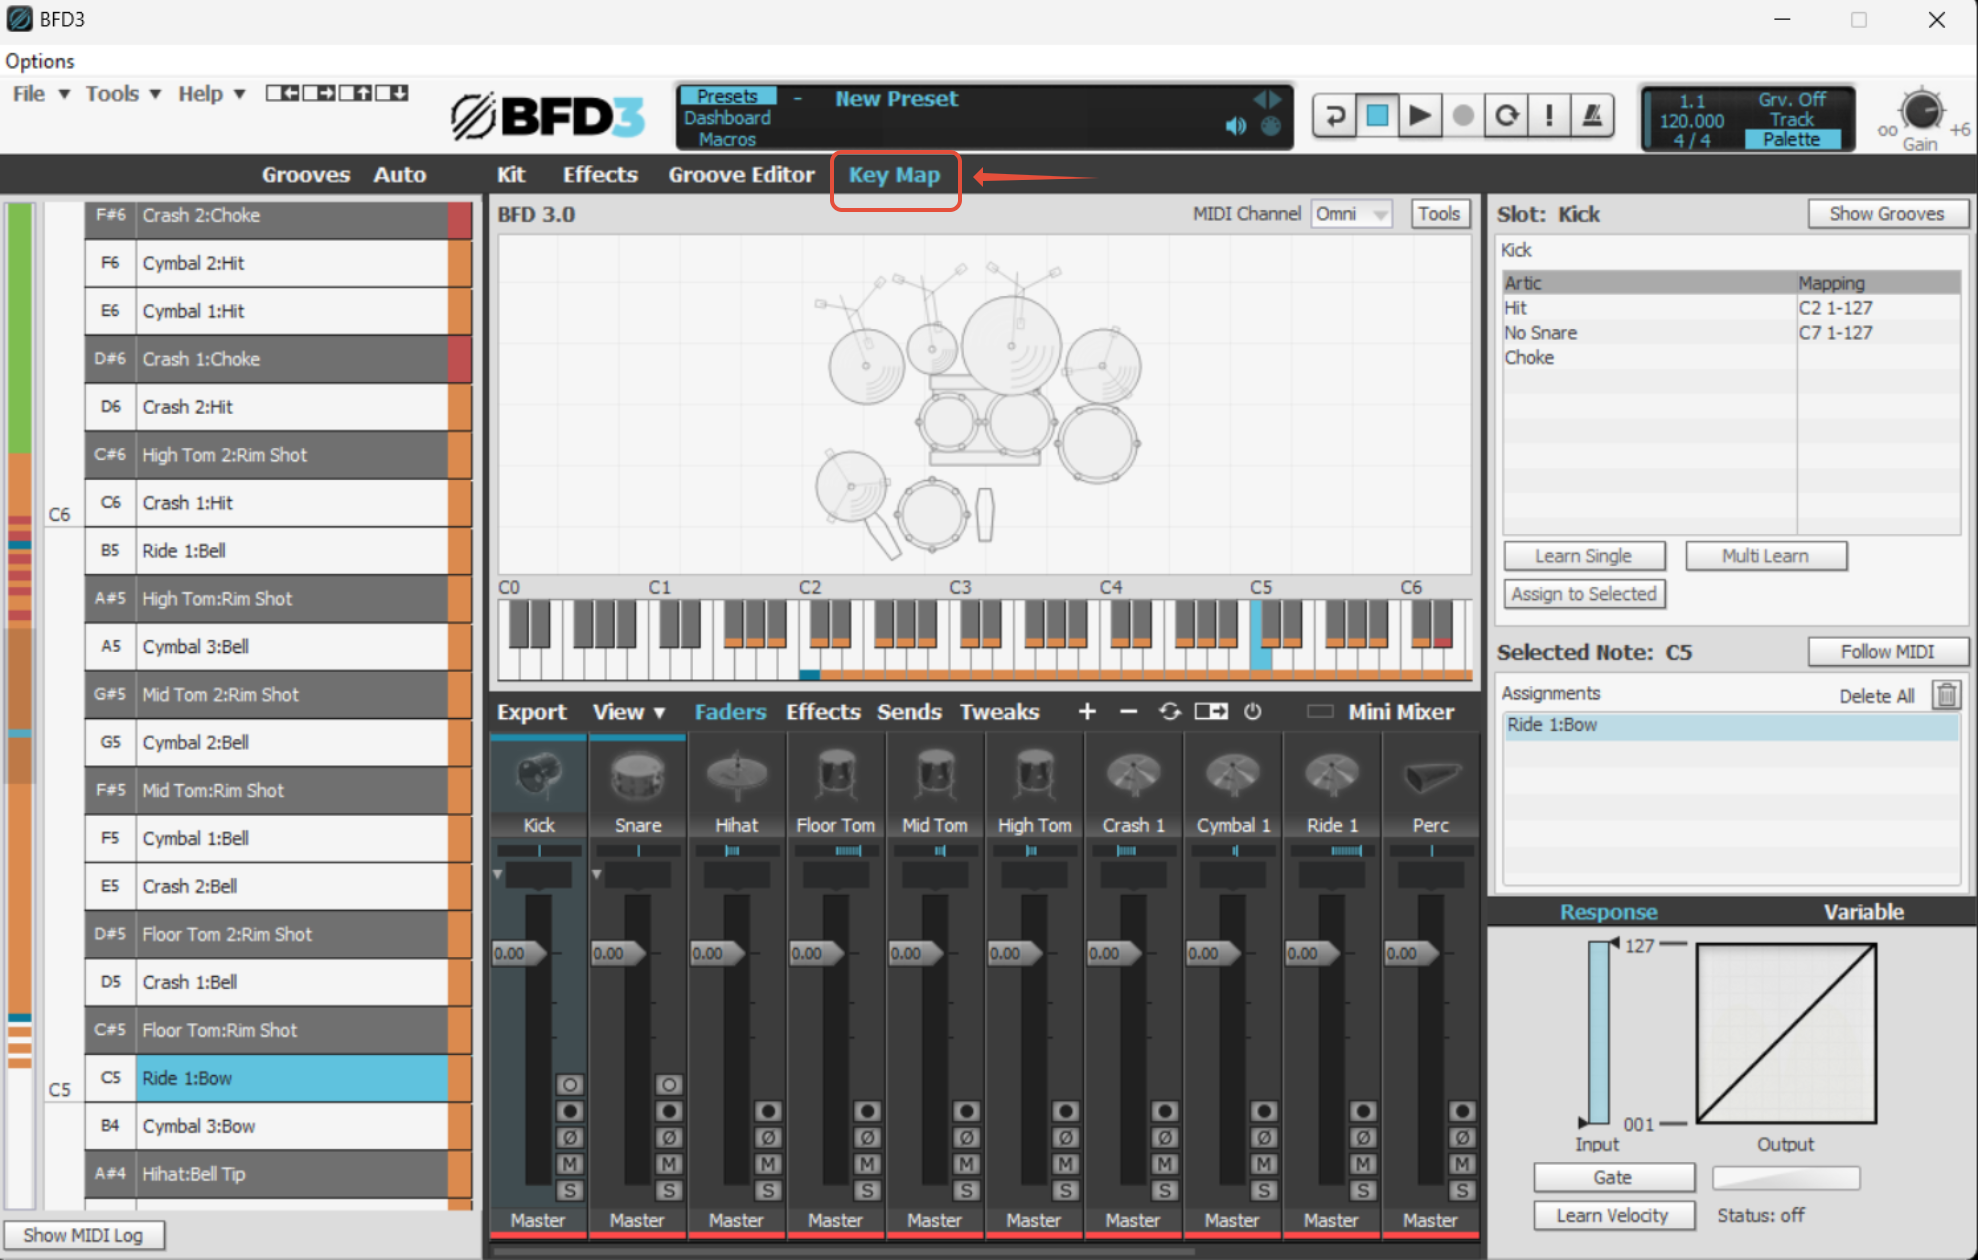
Step 2: Map Drum Articulations to MIDI Keys
You can assign drum articulations (such as snare hits or cymbal crashes) to specific MIDI notes.
- Select the drum (e.g., snare) from your kit or mixer.
- Choose a MIDI note on the virtual keyboard in the Key Map panel.
- Click the Assign to Selected button to map the articulation to the selected key.

If you wish to map multiple articulations (like snare variations), hold SHIFT/CTRL to select multiple articulations and assign them to a single key.
Step 3: Mapping Grooves to MIDI Notes
You can also map grooves by clicking the Show Grooves button in the Key Map panel. Drag grooves from the list to a specific MIDI note, or use the Assign to Selected method. 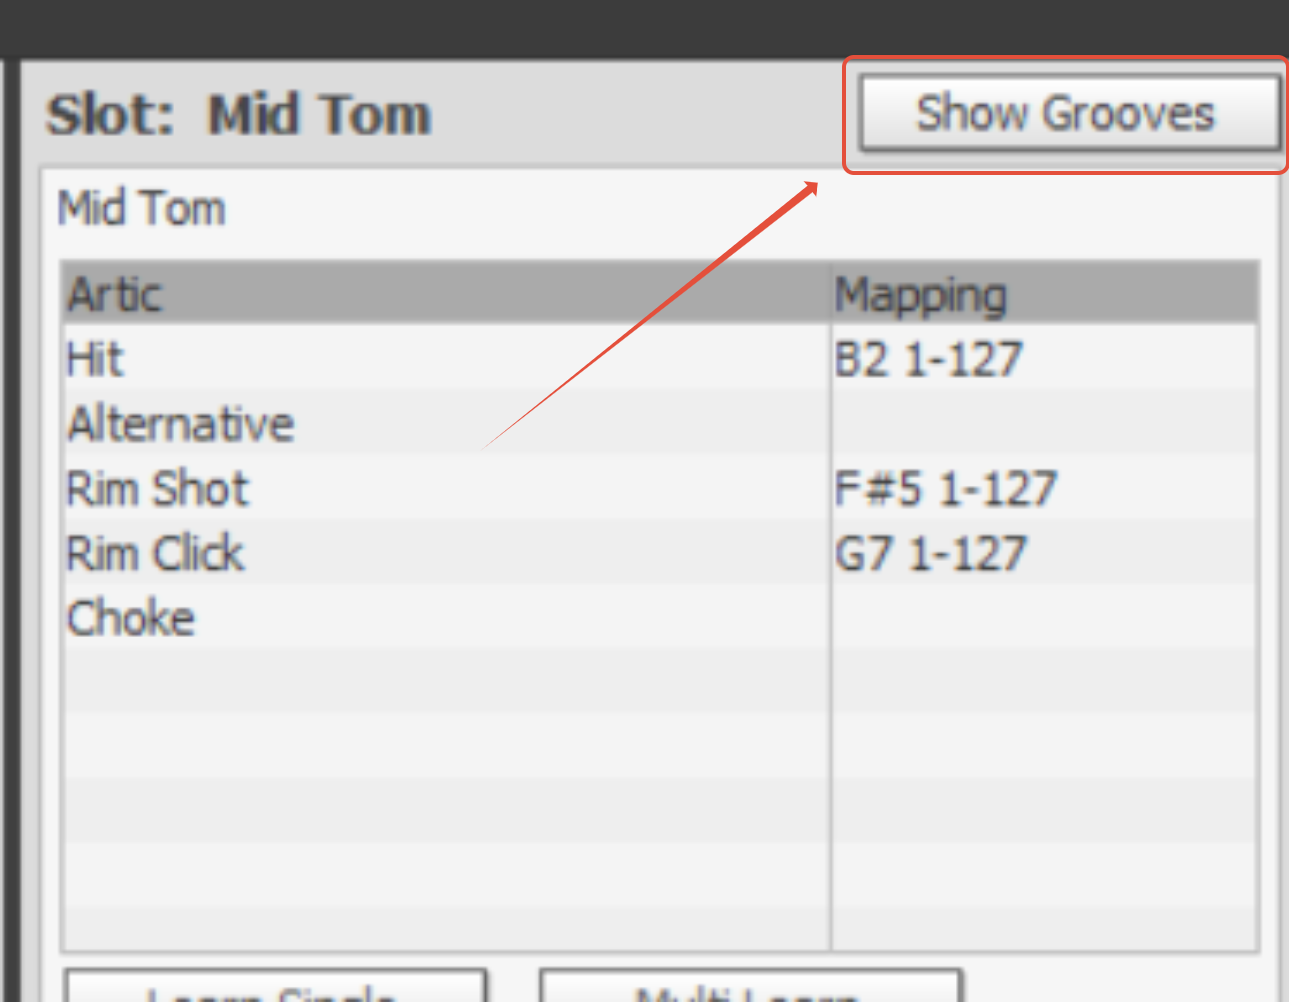
Step 4: Advanced Mapping Options & Velocity Splits
The Mapping Response Panel allows you to fine-tune how your drum articulations respond to velocity. You can set velocity splits, which allows you to assign different articulations (e.g., soft hit, loud hit) based on the velocity of your MIDI input.
- Select the articulation.
- Adjust the Input Range to define the velocity range for each articulation.
- Optionally, fine-tune the Output Curve to adjust how input velocities correspond to the articulation's sample playback.
Step 5: Save Your Custom Key Map
Once you have finished mapping, save your custom Key Map. Go to the File menu and choose Save Key Map. This will allow you to reload it anytime you need it in future sessions.
If you're having trouble creating or modifying your MIDI map, ensure that your drum kit or MIDI controller is correctly connected and configured. Also, ensure that BFD3 is receiving MIDI input correctly by enabling the Follow MIDI option in the Key Map panel.