M-Game Solo | Setup for Streaming Games with Voice Recognition on Windows 10 or 11
Contents
Hardware Setup
- Download and install the latest M-Game software (with embedded audio driver) from m-game.com.
- Connect the power and USB cable to the M-Game Solo and press the power button.
- Connect your separate headphones and microphone, or combined headset, to the rear panel of the M-Game Solo
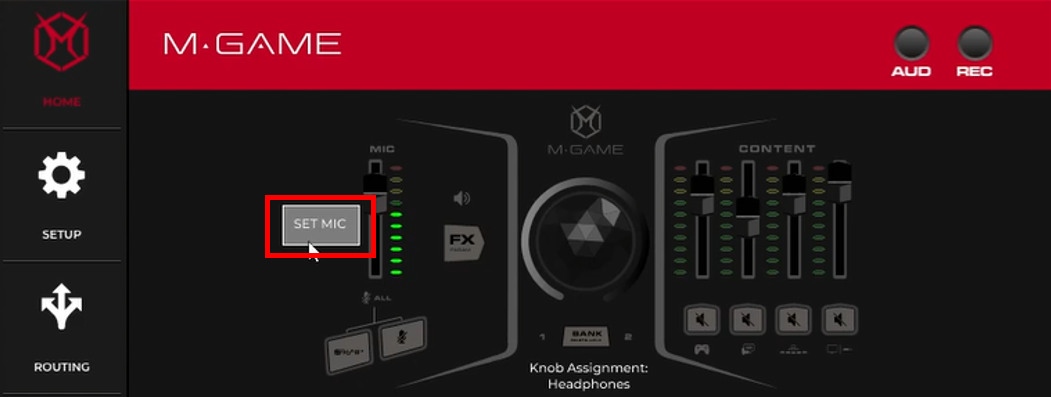
- Open the M-Game software and select either the SET MIC from the HOME tab and follow the on-screen instructions or go to the SETUP tab.
- Under Microphone, turn Phantom Power on or off depending on whether you’re using a condenser microphone (Phantom Power on) or a dynamic microphone (Phantom Power off).
Note: Headset microphones do not require phantom power.
- Speak into your mic at the loudest level you expect to speak in your stream and begin turning up the Gain knob on the rear panel of M-Game Solo. You'll notice that the Mic Fader LEDs on M-Game Solo will light up when you speak, showing the incoming signal. Continue speaking into the mic and turning up the Gain knob until you see the Mic Fader LEDs flash red 3 times. If you see the Mic Fader LEDs flash red 3 times, this means M-Game Solo's Mic Gain knob is set too high. Turn down the Mic Gain knob until you no longer see the LED flash red 3 times.
Gain knob set to high = flashing 3x
Gain knob set correctly = Close to the top LED at your highest speaking voice Note: If you are using a low gain mic (like a SHURE SM7B or ElectroVoice RE20) you will need to use the M-Game software's BOOST function. You can find BOOST in the Setup Tab under Basic Microphone Settings. You can change the BOOST level from Off to +24 dB.
Boost set to high = Top red LED lit in the software
Boost set correctly = Yellow LEDs lit at your loudest speaking voice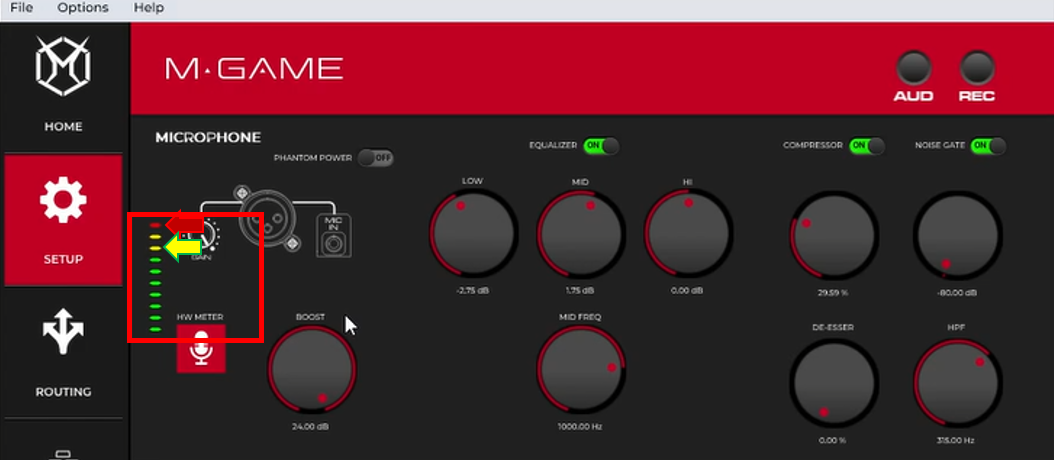
Note: Now that you’ve setup your mic you can turn off the HW Meter button in the M-Game Software to return the Mic fader to its default LED behavior
HW Meter On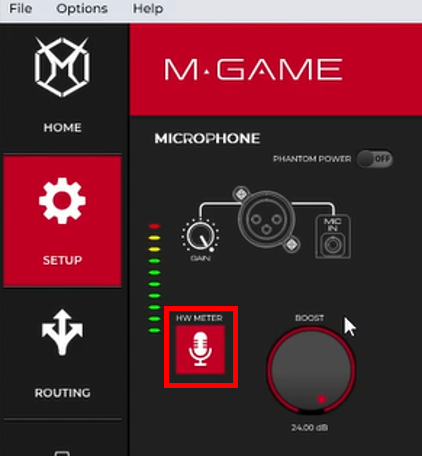
HW Meter Off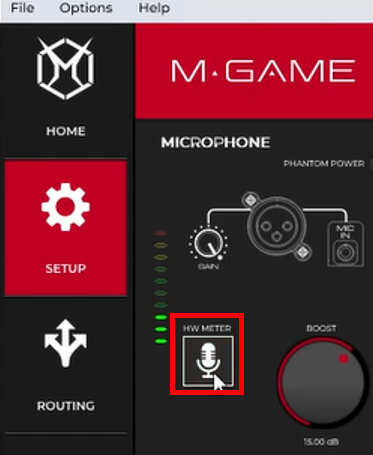
Adjust the EQ, Compressor, Noise Gate, High Pass Filter (HPF), and De-esser settings to get the best sound from your mic.
Note: You can also use one of the Mic presets in the M-Game software to automatically configure your mic’s settings. These mic presets are found in File > Setup > Load Microphone Settings.
- Under Microphone, turn Phantom Power on or off depending on whether you’re using a condenser microphone (Phantom Power on) or a dynamic microphone (Phantom Power off).
- In the SETUP tab's HARDWARE section select Stream PC as your Chat Audio Source and Game Audio Source.
- Open your game, chat, M-Game software, streaming software, and any other programs you will be running in your stream and ensure that their audio is playing.
- Press the Windows key and then type Sound Settings into the search bar. Alternatively, right-click the speaker icon in the taskbar and select Open Sound Settings.
Windows 10
Windows 11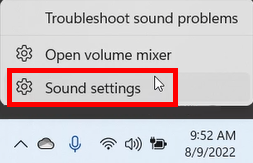
On Windows 10, in Sound Settings, under Sound Output select System, this will ensure any audio that you're not routing specifically to the M-Game Solo's Game, Chat or Sampler fader will default to be controlled by the System fader. Under Input select Stream, this will set your broadcast/stream mix as your default output source.
In Sound Settings under Advanced Sound Options, select App Volume and Device Preferences. In this window you will see every audio source running and where that audio is being sent to and from (its Routing).
This allows you to send audio from different programs to the M-Game.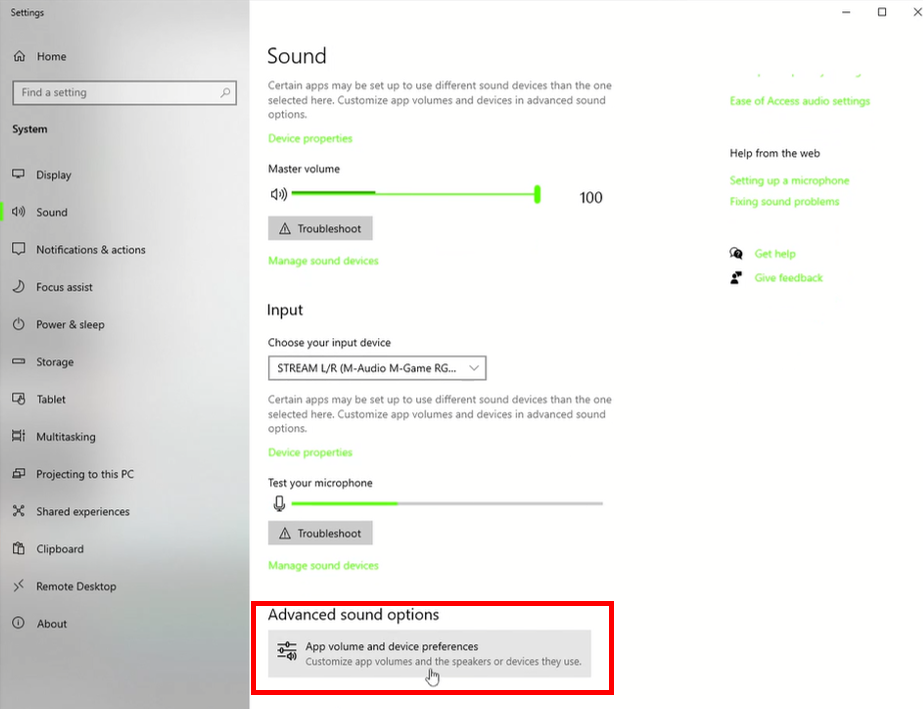
On Windows 11, in Sound Settings under Sound Output select System, this will ensure any audio that you're not routing specifically to the M-Game Solo's Game, Chat or Sampler fader will default to be controlled by the System fader. Under Input select Stream, this will set your broadcast/stream mix as your default output source.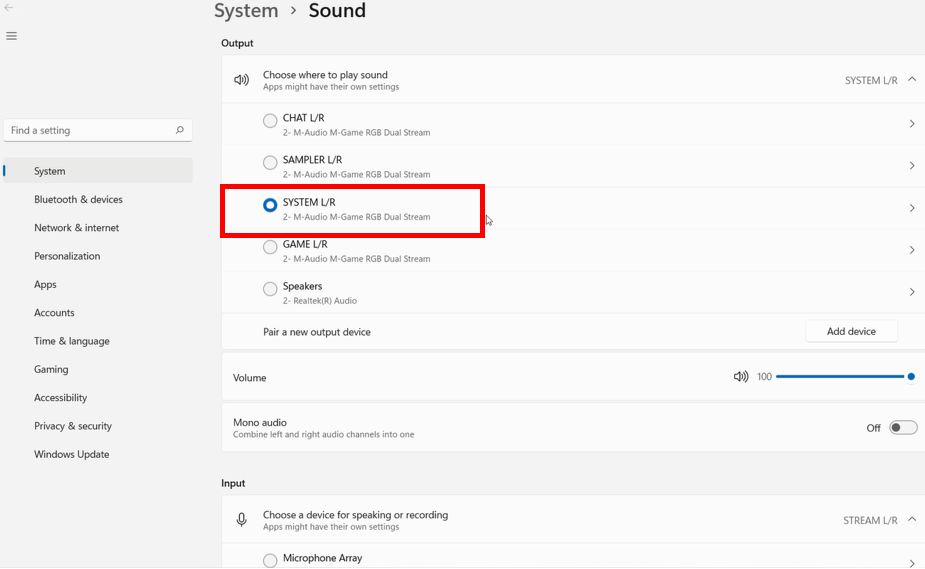
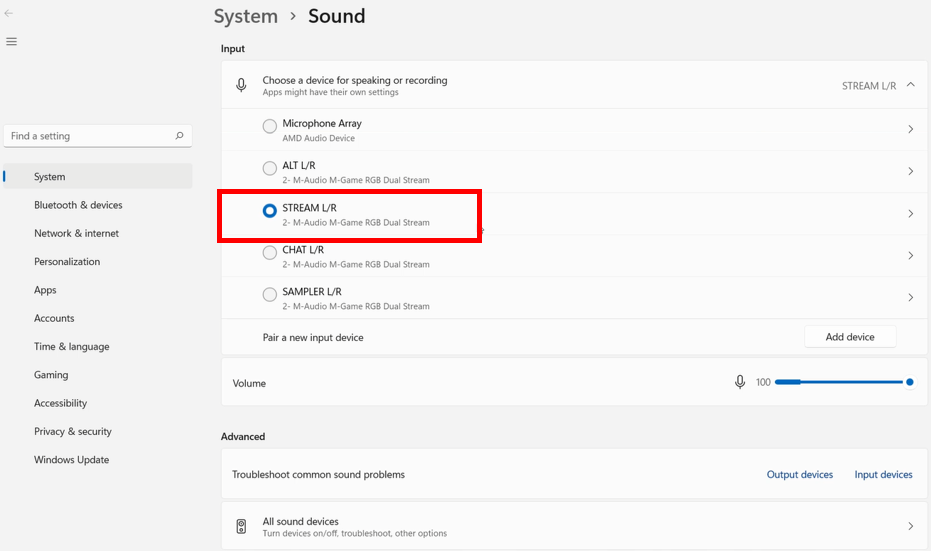
In Sound Settings select Volume mixer. In this window you will see every audio source running. You will also be able to select where that audio is being sent to and from (its Routing) by pressing the down arrow next to the app's volume slider.
This allows you to send audio from different programs to the M-Game.
- App Volume and Device Preferences (Windows 10), and Sound and Volume mixer (Windows 11), next to the chat application that you are running, select the Output dropdown and select Game (M-Audio M-Game Solo). Once this has been selected, your game's audio level will be controlled by the Game fader on your M-Game. Then next to the game application that you are running, select the Input dropdown and select ALT (M-Audio M-Game Solo). Once this has been selected, your mic audio (but is dependent on what you have to send to the ALT output in the Routing tab in the M-Game software) to your game app.
Important: Depending on which game you’re running, you may also need to select where your microphone audio is coming from. To do this, go into your game’s settings, and where it has a selection for where your audio or mic input is coming from, select ALT (M-Audio M-Game Solo).
Important: Make sure that your routing in the M-Game software is set to only send your microphone’s audio.
Windows 10: Windows 11:
 Important: The above image is a reference image of setting the ALT input in your software. Your software will vary from the above image.
 - Select these additional routing options from the Output dropdown in the App Volume and Device Preferences:
- Chat app (Discord, etc.): Select CHAT (M-Audio M-Game Solo) to route Chat’s audio to the Chat fader.
- Chat app (Discord, etc.): Select Input: CHAT (M-Audio M-Game Solo) to route your mic (but is dependent on what you have to send to the Chat output in the Routing tab in the M-Game software) to your chat app.
Important: If you're using a Chat application like Discord, set the Audio Input to CHAT L/R and Output to CHAT L/R.This will ensure that your Chat audio is sent to the M-Game Solo's Chat fader, and only your Mic audio sent to the Chat. This can be done in Discord by going to the bottom left cog icon (User Settings) next to your User Name and under APP SETTINGS selecting Voice and Video. In the Voice and Video window you will see Input Device and Output Device settings at the top under Voice Settings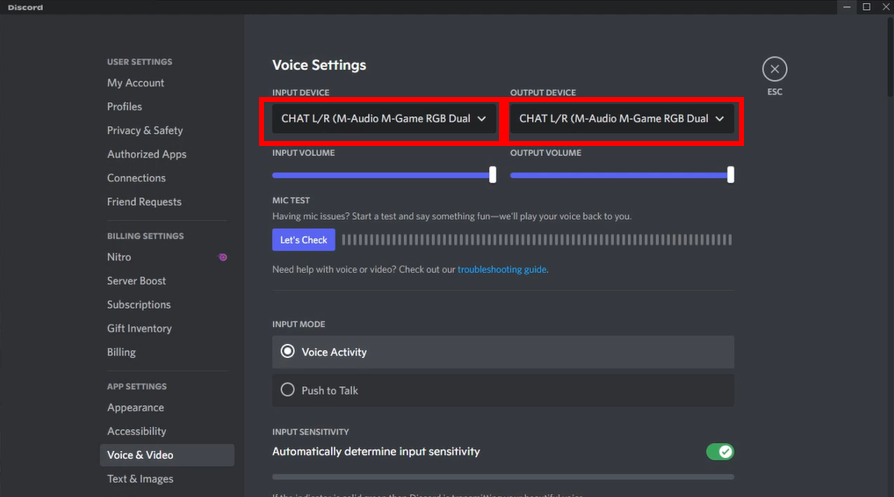
- Music: Select SYSTEM OUT to route music program audio to the System/AUX fader.
Note: You can route additional computer audio sources to the SYSTEM channel if you would like to control additional streams of software audio.
Windows 10 Windows 11
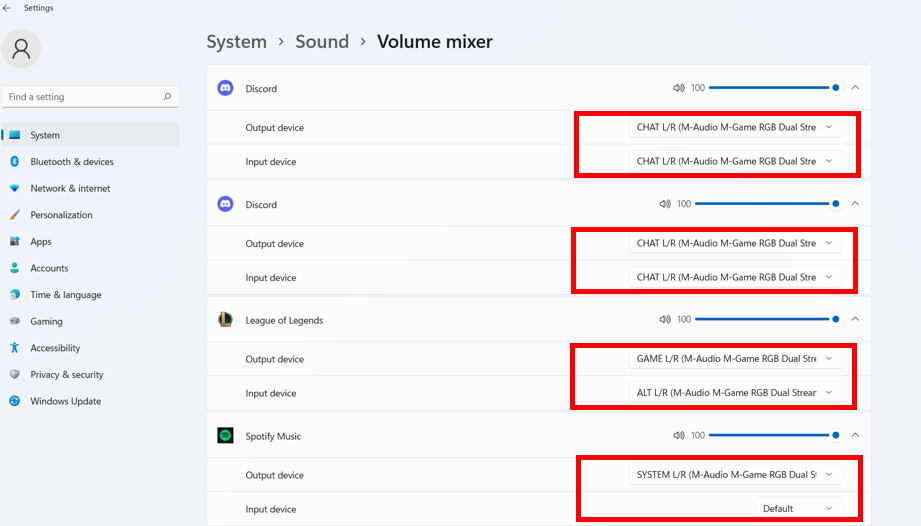
Routing
- Open your streaming/broadcast software, such as OBS used in the example below.
Setup with OBS
- In the File > Settings menu, select the Audio tab.
- Under Global Audio Devices set Desktop Audio to Disabled, and set Desktop Audio 2 to Disabled.
- Set Mic/Auxiliary Audio to STREAM L/R (M-Audio M-Game Solo Stream). Make sure that Mic/Auxiliary 2, 3, and 4 are all set to Disabled.
- In Advanced, set Monitoring Device to Default. Click Apply and OK.

- Check OBS or other software you're using to record to make sure that your individual signals (Mic, Game, Chat, Sampler, and System) signals aren't clipping (going into the red) and are balanced. An easy way to check this is by pressing all of the Mute buttons on the M-Game hardware and turning up the fader levels one at a time, first checking the mic level, as that's what you want your viewers to hear loudest, then proceed with the other M-Game faders.
Note: The optimal level in OBS is in the yellow area (between -15 dB and -10 dB).
- Start your stream and have fun!
Was this article helpful?
That’s Great!
Thank you for your feedback
Sorry! We couldn't be helpful
Thank you for your feedback
Feedback sent
We appreciate your effort and will try to fix the article