
This article serves as a guide to educate on the MPC's RAM and how to manage your MPC's resources in a project regarding 'Low Memory'.
Note: If you are receiving 'Disk Space Low - Warning Low on Temporary Space' or 'Please check temporary path in preferences and memory use' - refer to this dedicated article instead: MPC 3 | Disk Space Low - Warning Low on Temporary Space
TABLE OF CONTENTS
- MPC RAM Explained
- Controller Mode
- Plugin Usage & Limits
- Bounce to Sample / Bounce To Audio Track
- Deleting Unused Samples
- Auditioning Kit Samples Rather Than Loading Multiple Kits/Samples
MPC RAM Explained
All MPC’s are built with a fixed amount of RAM:
Gen 1:
2 GB: MPC Live, Live II, MPC X, Key 37, MPC One, One+
4 GB: MPC Key 61, MPC X SE
Gen 2:
8 GB: MPC Live III
16 GB: MPC XL
RAM is the dynamic memory used by the MPC to physically hold your currently active project. In simpler terms, the larger the RAM - the greater the performance/handling.
RAM is in charge of handling things like:
- Plugin instruments - Each plugin instrument loads its entire sound library into the MPC's RAM
- Audio samples loaded into drum programs - Each drum program loads all its assigned samples into RAM at once - even if they are not being triggered
- FX processing data - Adding insert effects, automation and long audio tracks also consumes RAM, as this must be buffered in real time for playback.
To help alleviate this, we recommend the following steps:
Controller Mode
Plugin Usage & Limits
With this in mind, each plugin instrument also loads its entire sound library into the MPC's RAM. Some are ‘heavier’ than others – i.e Studio Strings & Fabric.
- Deleting multiple instances of the same plugin
- Bouncing the plugins to audio tracks as described in the chapter below
Bounce to Sample / Bounce To Audio Track
The Bounce to Sample function renders the current track in the arrangement as an audio sample and places it in the project’s sample pool. By default, it will be named Bounce and appended with the track name. Use the Audio Tail field to set the amount, in seconds, of extra time added to the end of the resulting audio files.
Main Mode: Tap the pencil icon in the 'Arrangement' tab

Arranger View: Tap and hold the plugin track

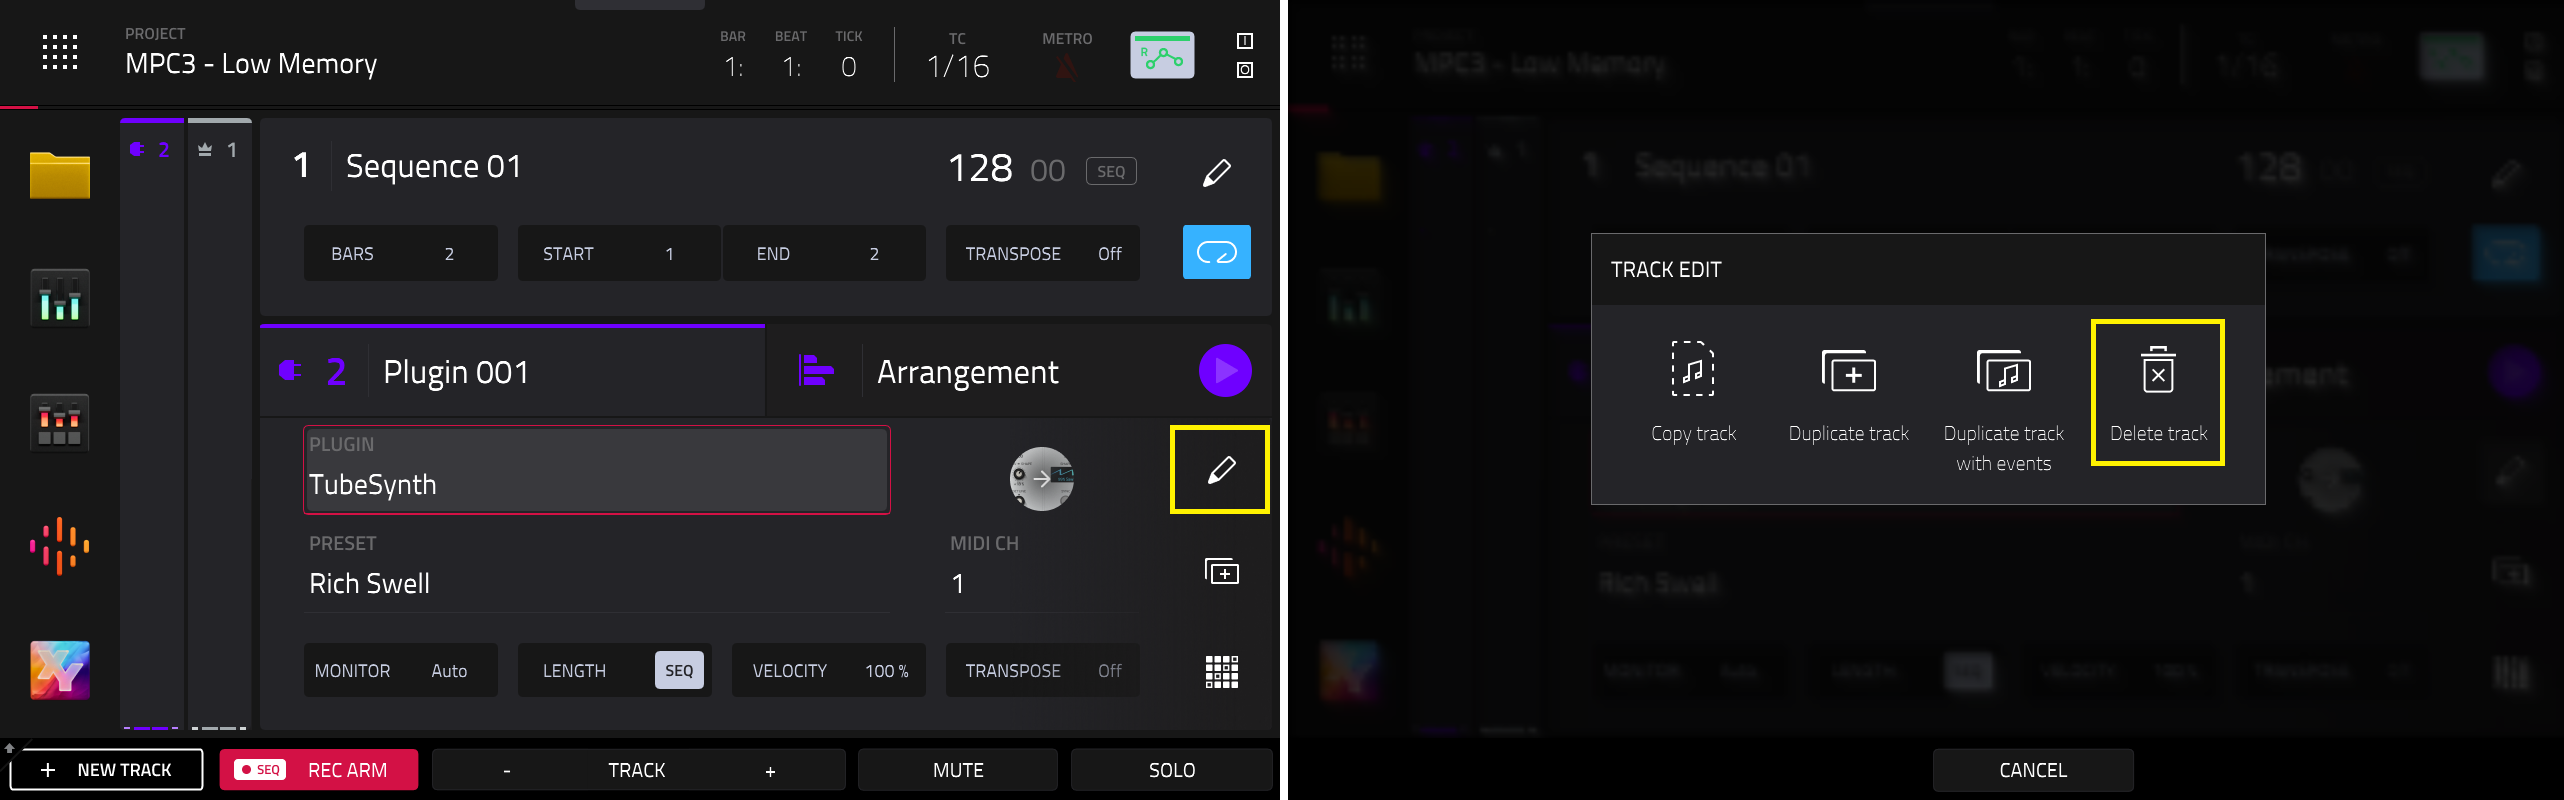
After this, you can delete the plugin tracks by tapping the pencil icon besides your plugin track and tap Delete Track.
Deleting Unused Samples
It's also a good idea to delete unused tracks and samples via Menu > Project:

- Delete: In the screen that appears, tap any unused samples to delete all unused samples from the project
- All Samples: Tap All Samples to delete all samples from the project (from all tracks, sequences, and audio or MIDI tracks), or tap Cancel to return to the previous screen.
- Purge: To delete samples from the project (to create more free RAM space for sampling time, audio recording, etc.), tap Purge.
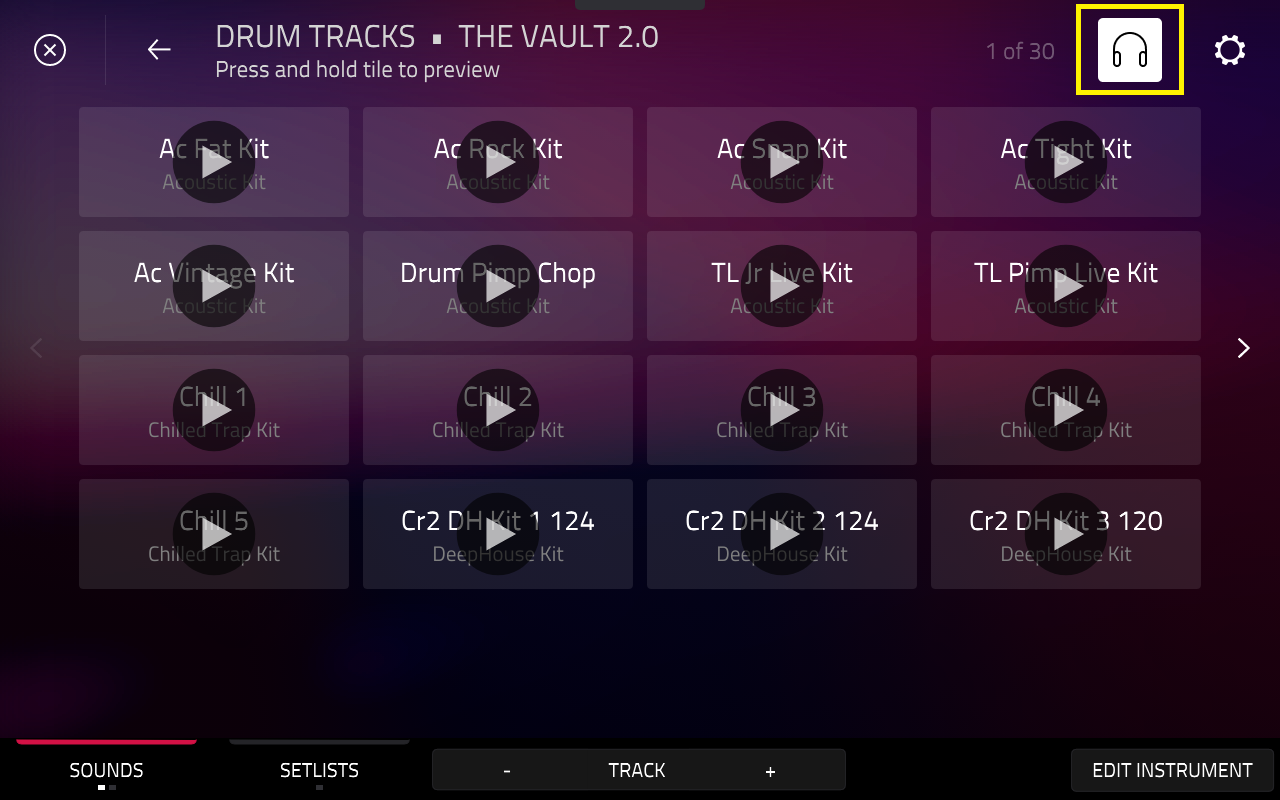
Auditioning Kit Samples Rather Than Loading Multiple Kits/Samples
2. Select your expansion and the relevant expansion folder (Drums or Keygroup)
3. Tap the headphone icon (top right corner)
4. Once enabled, tap and hold on a cell’s play icon to audition the selected sound.


Further guidance on auditioning sounds can be found in this article: Akai Pro MPC Series | How to Audition Expansions
Was this article helpful?
That’s Great!
Thank you for your feedback
Sorry! We couldn't be helpful
Thank you for your feedback
Feedback sent
We appreciate your effort and will try to fix the article