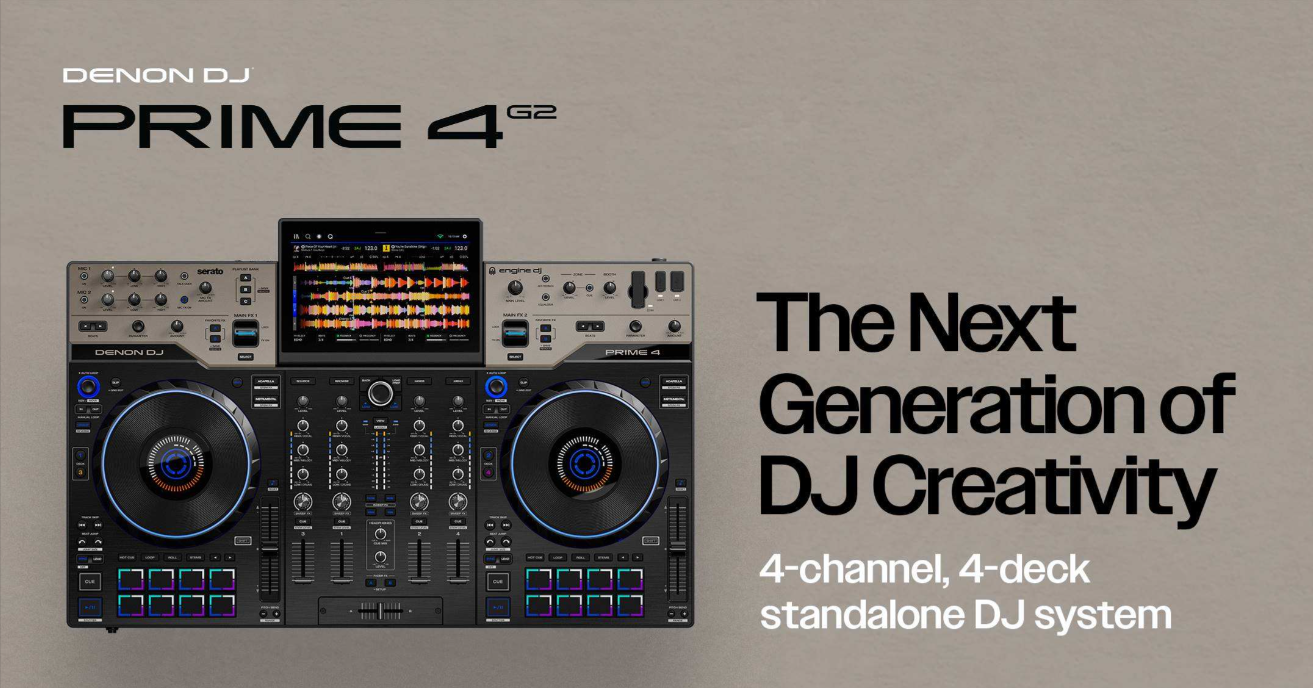
The Denon DJ PRIME 4 G2 is the ultimate 4-deck standalone DJ system, bringing together the very best innovations from Engine DJ into one powerhouse performance unit. Powered for the future, the PRIME 4 G2 delivers next-level standalone performance with four times the processing power of the previous generation, ensuring lightning-fast responsiveness and flawless operation, even in the most demanding sets.
From weddings and mobile events to clubs and festival stages, the PRIME 4 G2 is designed to be the centerpiece of any professional DJ setup.
In this article, we answer the most popular questions about the features and functionality of the Denon DJ PRIME 4 G2. We’re honored and excited to play a part in your musical and creative DJ journey!
TABLE OF CONTENTS
- Getting Started
- Standalone Preparation with Engine DJ
- Streaming Services
- Firmware Update Methods
- Engine Stems
- Media Storage and I|O
- Mixer Controls
- Deck Controls
- SoundSwitch and Engine Lighting
- Effects
- Utility and Miscellaneous
Getting Started
What comes in the box with the PRIME 4 G2?
- PRIME 4 G2
- Locking IEC Power Cable (region specific)
- Locking USB-C Cable
- QuickStart Guide
- Safety & Warranty Manual
- Display cover
- Display cleaning cloth
- SoundSwitch free trial voucher
What are the differences between the Prime 4+ and the Prime 4 G2?
Feature | PRIME 4+ | PRIME 4 G2 |
|---|---|---|
4-Deck Standalone Playback | ✅ | ✅ |
10.1" Touchscreen | ✅ | ✅ |
Full size 8" jog wheels | ❌ | ✅ |
Internal SATA Drive Bay | ✅ | ✅ |
FX paddles |  | ✅ |
Wi-Fi Streaming Services | ✅ | ✅ |
Bluetooth I|O/keyboard support | ✅ | ✅ |
Stems Included as Standard | ✅ | ✅ |
Dedicated Stems Controls | ❌(Secondary Pad Mode) | ✅ |
Stem Level EQ and FX | ❌ | ✅ |
Onboard Stems Rendering | ❌ | ✅ |
Dedicated DMX Output for Engine Lighting | ❌ | ✅ |
| XLR Main and Booth Out | ✅ | ✅ |
XLR Zone Output | ✅ | ✅ |
Computer Connection | USB-B | USB-C with locking thread |
OmniSource Support | ❌ | ✅(post launch, TBA) |
MPCe pads | ❌ | ✅ |
What DJ software is supported with the PRIME 4 G2?
Upon launch, the PRIME 4 G2 will be compatible with Engine DJ. SoundSwitch is also fully supported with the PRIME 4 G2.
Support for Serato DJ Pro, Algoriddim djay and Virtual DJ are anticipated in future update(s).
Do I need to download anything in order to get started?
If the PRIME 4 G2 is your first step into the Engine DJ ecosystem, it is essential to download the Engine Desktop software for either Mac or Windows. Links for both platforms can be found below:
Standalone Preparation with Engine DJ
- Download and install the Engine DJ desktop software using the links above.
- Import music into the Engine DJ software to analyze it and prepare your music for stems, then export your music to your media device.
- Place PRIME 4 G2 on a flat, stable surface.
- While the power is switched off, plug the included power cable into PRIME 4 G2 first, then plug the cable into a power outlet.
- Power on PRIME 4 G2 using the power button.
- During startup, you will first be presented with a Wi-Fi connection menu to connect to your local network. After the initial setup, you can dismiss this screen each time, or set it to not show again at startup. You can also adjust your connection settings at any time using the Wi-Fi menu in the Control Center.
- Once connected to the internet, follow the on-screen prompts to update to the latest firmware (if available). Firmware can also be downloaded from enginedj.com/downloads When the firmware update is complete, PRIME 4 G2 will restart.
- Next, you will be prompted to connect to your Engine DJ profile. With your Engine DJ profile, you can register your device, connect streaming and cloud services so you can log into each with a single Engine DJ profile login, and access crowd-sourced streaming metadata and beat grid information. You can use a mobile device to scan the QR code, or visit device.enginedj.com and enter the code shown. You can also dismiss this screen each time, or set it to not show again at startup. To log in to an Engine DJ profile at any other time, use the Log In button found in the Profile menu.
- PRIME 4 G2 has more settings that you can customize in the Layout, Profile, and Settings menus.
Streaming Services
What onboard Streaming Services can I use?
Amazon Music Unlimited
- Apple Music
- Beatport
- SoundCloud Go+
- TIDAL (+ DJ Add-On)
How do I connect to streaming services?
- Connect the PRIME 4 G2 to Wi-Fi.
- Sign in to your Engine DJ profile.
- Link your streaming service accounts.
- Browse playlists, albums and tracks directly from the touchscreen.
- Load and play streamed tracks just like local files.
Can I Record a Set Using Streaming Music?
Many streaming providers restrict recording due to licensing agreements.
Users should assume that recordings containing streamed content may not be permitted unless explicitly allowed by the streaming provider. Restrictions are determined and controlled by the streaming service provider.
Does PRIME 4 G2 support Rekordbox, Serato, iTunes and Traktor Libraries?
As a standalone device, the PRIME 4 G2 can natively read Rekordbox-exported media drives. This allows Rekordbox users to connect their USB or SD media and access their music library, playlists, and Hot Cues directly on the device, without the need for conversion software.
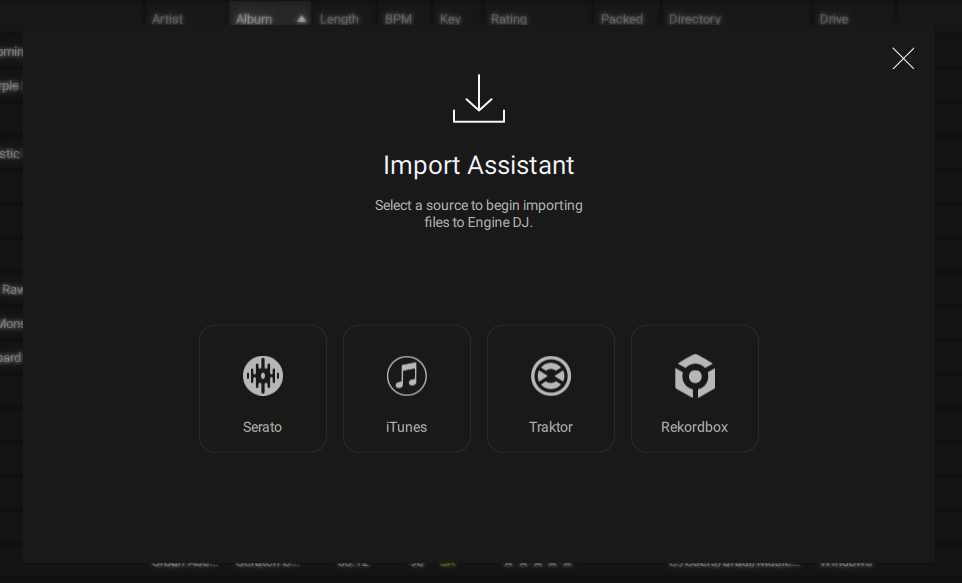
In addition, Engine DJ Desktop provides native library import support for iTunes/Music, Serato DJ, Rekordbox, and Traktor collections. Using the Import Assistant, users can select the desired music database and import their tracks, playlists, cue points, and library structure into Engine DJ. Once imported, the library is converted into the Engine DJ database format, allowing it to be prepared and exported for seamless standalone playback on the PRIME 4 G2.
Firmware Update Methods
Keeping your PRIME 4 G2 up to date ensures you have access to the latest features, performance improvements, bug fixes, and compatibility enhancements. The PRIME 4 G2 supports multiple firmware update methods, allowing users to choose the most convenient option depending on their setup and internet availability.
Method 1: Wi-Fi (Over-the-Air) Updates
The simplest and most convenient way to update the PRIME 4 G2 is via a direct internet connection.
During the initial startup process, the PRIME 4 G2 can connect to a local Wi-Fi network. Once connected, the unit will automatically check for available firmware updates and prompt you to install any newer versions. Simply follow the on-screen instructions, and the device will download, install, and restart automatically once the update is complete.
Method 2: USB Drive or SD Card Updates
For users who do not have access to Wi-Fi, firmware updates can be installed from removable media.
First, download the latest firmware package from the Engine DJ downloads page using a computer. Once downloaded, copy the firmware update file to a compatible USB drive or SD card that is formatted as FAT32 or exFAT. Insert the media into the PRIME 4 G2 and follow the update instructions from the device's update menu. The unit will verify the firmware file, install the update, and restart upon completion.
Method 3: Computer-Based Firmware Updater
The PRIME 4 G2 also supports updates through a dedicated firmware updater application when connected directly to a computer.
This method is typically used for advanced troubleshooting, recovery from a failed update, or when specifically instructed by Denon DJ Support. Connect the PRIME 4 G2 to a computer using the locking USB-C connection, place the unit into Firmware Update Mode, and run the firmware updater application supplied with the firmware package. The application will transfer the firmware to the device and complete the installation process.
Does the PRIME 4 G2 require any drivers to use with a computer?
At launch, the PRIME 4 G2 is designed as a standalone Engine DJ system. As a result, there are currently no computer drivers available or required for use with these DJ software platforms.
Driver availability and installation requirements, if any, will be confirmed when official compatibility with each supported software platform is released.
Engine Stems
Stems Mode is automatically included with PRIME 4 G2 hardware. Track stems can be created directly on PRIME 4
G2 (partially swipe a track to the left and tap Stems), or using the Engine DJ software and packed to an external drive
for use with PRIME 4 G2.
What hardware controls are there for Engine Stems?
The PRIME 4 G2 is capable of activating Engine Stems through the following methods.
- Stems Pad Modes with Stem FX
- Acapella/Instrumental buttons with Stem
- Stem Level EQ
Do I need to purchase an Engine Stems license to use PRIME 4 G2?
No, the PRIME 4 G2 unlocks Engine Stems without having to purchase a license. You simply need to render the stems in Engine Desktop before hand.
How do I create stems in Engine Desktop?
Drag and drop tracks or playlists into the Stems Playlist, or right click on a track(or group of tracks) and select Create Stems.
How do I render stems on the PRIME 4 G2?
To add a track to the Stems list, partially swipe a track to the left and tap Stem. Tracks added to the stems list that have not previously been rendered are processed in the background as you use the PRIME 4 G2 and are saved on the current drive for future recall. Stems cannot be used until the entire track has been rendered.
To remove a track from the Stems list, tap the edit icon at the top of the display to enter editing mode, and then swipe left on the desired track, or partially swipe left and tap Remove Stems. This will remove the track from
the stems list and remove the stems themselves.
Note: Stems cannot be removed if the track is loaded to a deck
Media Storage and I|O
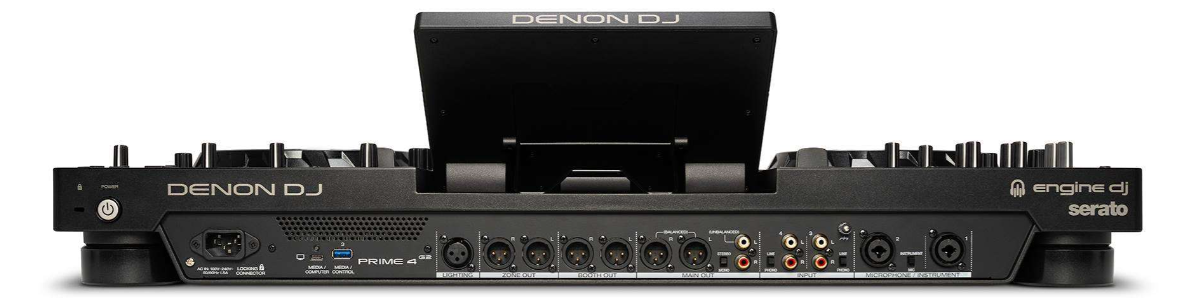
What options do I have to connect external drives and other storage devices to the PRIME 4 G2?
The PRIME 4 G2 features (2) USB-C ports, (1) SD Card slot and (2) USB-A ports.
Note: You will need to purchase your own drives to use with the device.
What size hard drive can I install into the PRIME 4 G2?
PRIME 4 G2 can support nearly any standard 2.5” (63.5 mm) form factor SATA drive on the market. A solid-state drive (SSD) is highly recommended for the best performance, especially when using Stems, but you can also use a hard-disk drive (HDD). Drives should be formatted to an exFAT file system prior to installation for best results.
Note: Alternatively, you could install an mSATA (mini-SATA) drive, but make sure you also purchase an adapter that enables it to fit into a typical 2.5” SATA interface.
IMPORTANT: If your internal drive has not been formatted prior to installation, you will see an option titled Setup
Internal Drive in the Connect New Sources section of the Source menu. Select this option to enter Device Storage
mode, where you can format your device to an exFAT file system. Scan the QR code shown on your touchscreen for
additional help with setting up your drive
What drive formats are compatible with the PRIME 4 G2?
File Systems: exFAT (recommended), FAT32
Playable Media:
- AAC/M4A
- AIF/AIFF (44.1–192 kHz, 16–32-bit)
- ALAC
- FLAC
- MP3 (32–320 kbps)
- MP4
- Ogg Vorbis
- WAV (44.1–192 kHz, 16–32-bit)
What I/O is available on the PRIME 4 G2?
Audio Inputs:
- Mic 1: XLR + 1/4”/6.35 mm Combo Jack
- Mic 2/Instrument: XLR + 1/4”/6.35 mm Combo Jack
- Channel 3: Stereo Pair (RCA)
- Channel 4: Stereo Pair (RCA)
Audio/Lighting Outputs:
- Main XLR (2)
- Booth XLR (2)
- Zone XLR (2)
- Stereo Pair (RCA)
- Headphones 1/4”/6.35 mm Stereo Jack & 1/8”/3.5mm Stereo Mini-Jack
- DMX for Engine Lighting
Media Inputs:
- USB 1: Type-A, USB 2.0 High Speed, 1.0 A
- USB 2: Type-C, USB 2.0 High Speed, 1.0 A
- USB 3: Type-A, USB 3.0 SuperSpeed, 1.0 A
- Computer/Media: Dual Roll Type-C, USB 3.0 SuperSpeed, 2.0 A
- SD, SDHC, SDXC
- Internal HD SATA 3.0
Mixer Controls
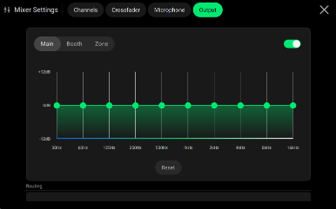
What is Output EQ on the PRIME 4 G2?
Output EQ provides global tone control for the PRIME 4 G2's master output, allowing DJs to adjust the low, mid, and high frequencies being sent to the sound system. Unlike channel EQ controls, Output EQ affects the entire mix, making it ideal for tailoring your sound to different venues, speaker systems, and room acoustics without altering individual deck settings.
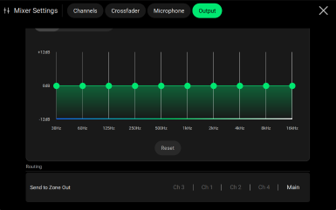
Can I use all of the outputs simultaneously?
Yes, all outputs can be used simultaneously, including the Zone Output. Use the Zone Output to easily send your master signal out to another room (will receive master signal by default), or use the Zone Channel Assign button to set Deck 4 as a Zone Playlist for an alternate mix.
What Bluetooth features are available on the PRIME 4 G2?
The PRIME 4 G2 includes built-in Bluetooth audio input, allowing you to wirelessly stream audio from a smartphone, tablet, or other Bluetooth-enabled device. Bluetooth can be assigned to any mixer channel through the Mixer Settings menu, enabling you to mix wireless audio alongside Engine DJ decks, computer audio, and external sources. Once assigned, the Bluetooth source can be controlled using the channel fader, EQ controls, and crossfader routing, just like any other mixer input.
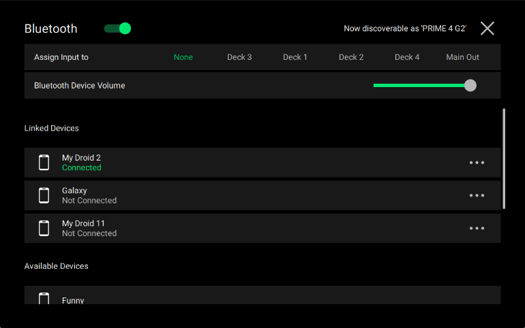
What Bluetooth capabilities does the PRIME 4 G2 offer?
The PRIME 4 G2 is supports both Bluetooth audio devices and Bluetooth keyboards. This allows users to stream audio wirelessly from compatible devices or use a Bluetooth keyboard to simplify searching and browsing large music libraries.
Can I use Bluetooth headphones or speakers?
Yes. PRIME 4 G2 supports Bluetooth audio output devices like speakers and headphones, but please note, there will be an inherent noticeable delay between the Prime 4 G2 and the Bluetooth audio device.
Is the crossfader user-replaceable?
Yes, the Prime 4 G2 crossfader is user serviceable and replaceable.
What size is the display?
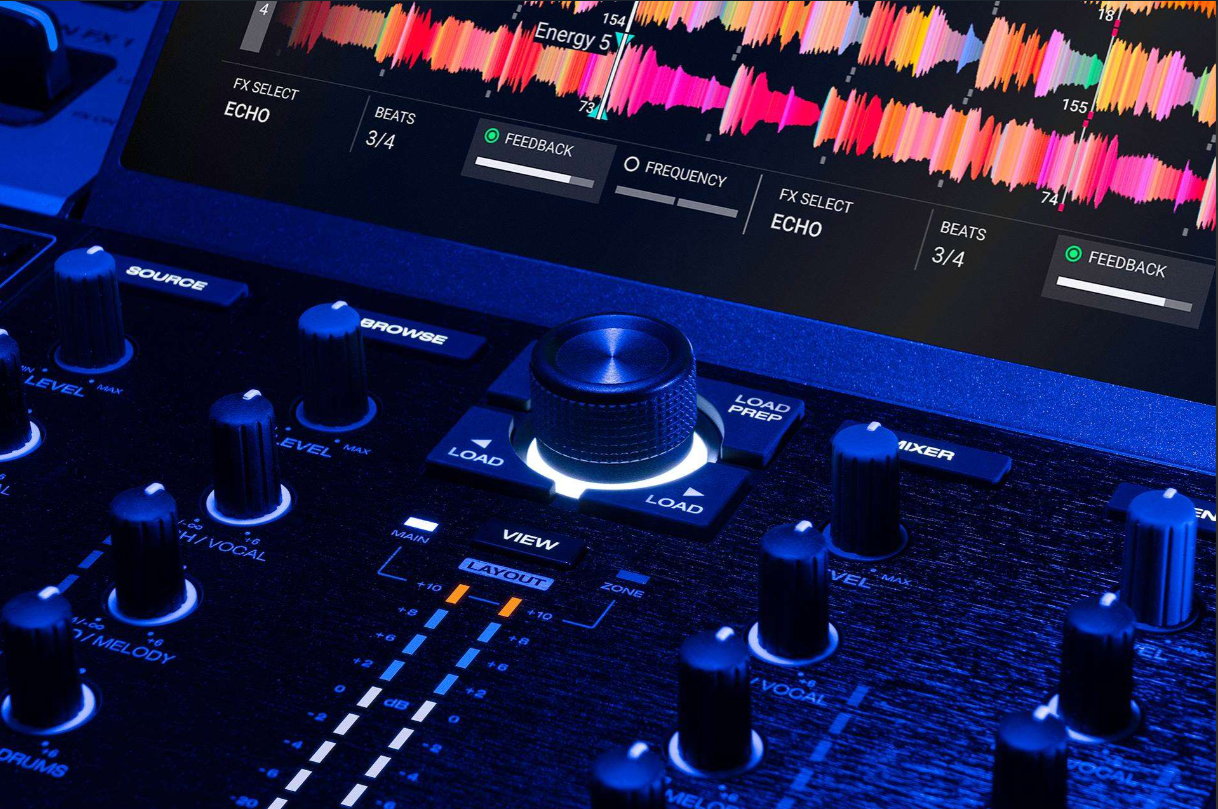
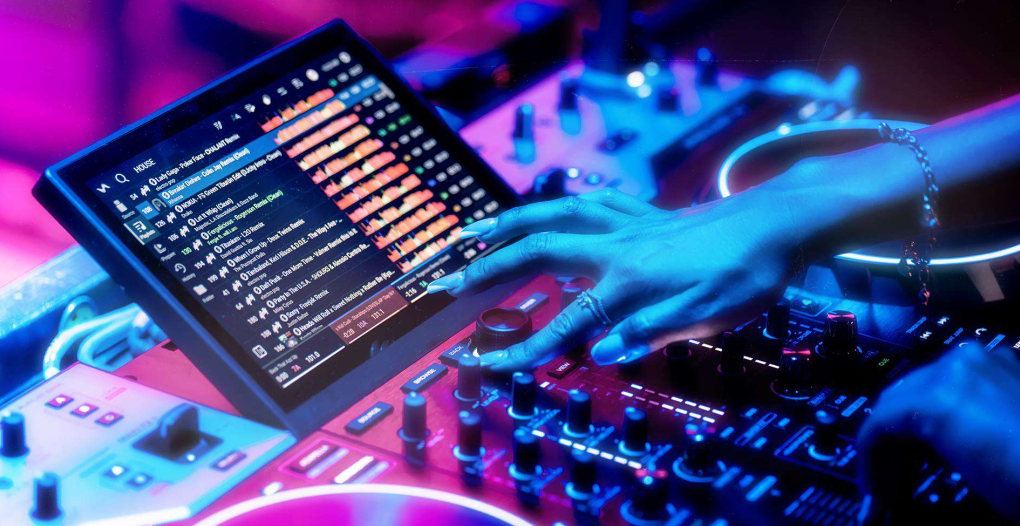
The PRIME 4 G2 features a 10.1-inch HD multi-touch display. The touchscreen is used for browsing music, waveform views, performance controls, mixer settings, FX control, streaming services, Engine Lighting control, and general device configuration.
Deck Controls
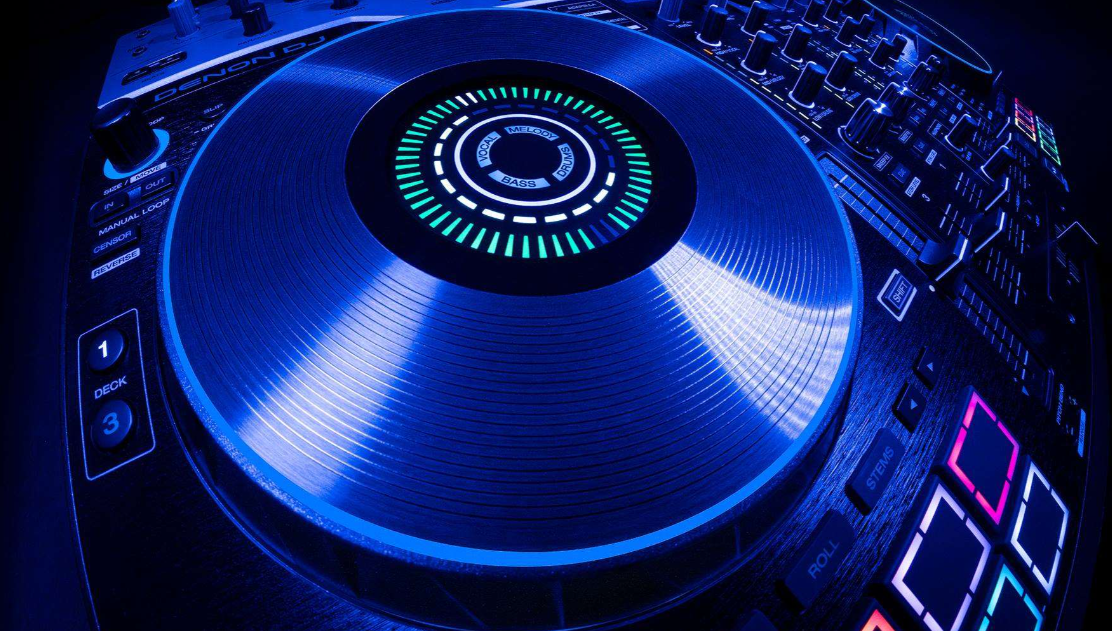
What size are the jog wheels?
The PRIME 4 G2 has full-size 8-inch jog wheels with integrated color displays.
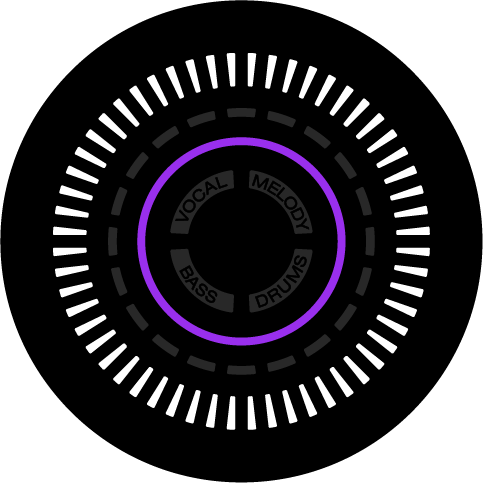
What Do the PRIME 4 G2 Jog Wheel Displays Show?
The PRIME 4 G2 jog wheel displays feature a multi-color display that provides feedback on the current play state of the track.
There are four elements to the platter display which are described below.
- Needle Ring
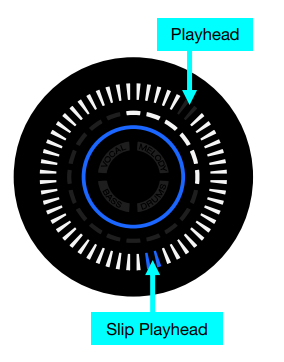
The outermost segments display the current playhead position. At the start of the track, the top two segments will remain unlit, indicating the playhead. These segments will rotate clockwise around the needle ring during playback.
When Slip mode is enabled, a secondary playhead indicator will appear as two blue segments. This indicator shows the actual playhead position as the track’s timeline continues. This helps you identify where playback will resume when exiting Slip mode.
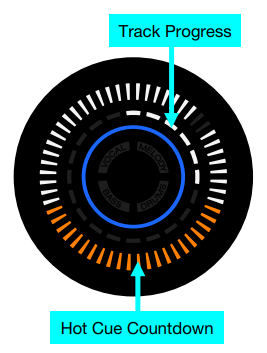
When the Hot Cue Countdown is enabled in the Settings > Device menu, the needle ring will also illuminate to indicate an approaching or recently passed hot cue point.
As the hot cue approaches, the needle ring segments will illuminate up in the next hot cue color, starting from the bottom and filling up symmetrically on both sides going up. Once the hot cue is reached and the colored segments reach the top of the ring, the segments will begin returning back to white, moving symmetrically downward until it reaches the bottom.
If the current deck is set to Line or Bluetooth, all Needle Ring segments will remain illuminated in white. Some Bluetooth sources may provide track progress information.
- Track Progress Ring
The second outermost segments display track progress. When the track time is set to Elapsed, the segments will illuminate clockwise from the top. When the time is set to Remaining, the segments will be fully illuminated and turn off sequentially clockwise.
If the Track End Warning setting is on, this will also flash to indicate the track is nearing its end. You can adjust this in the Profile > Display menu.
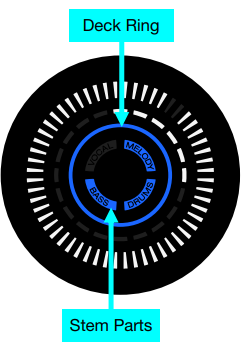
- Deck Ring
This solid circle displays the color of the active deck. This can be adjusted in the Profile > Deck Colors menu.
- Stem Parts
The icons in the center of the platter display indicate whether a Vocal, Melody, Bass, or Drums stem is activated. When the stem part is activated, the corresponding segment will be illuminated in blue. When the stem part is deactivated, the corresponding segment will be off.
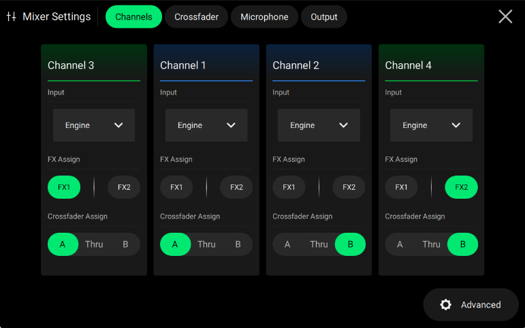
The Mixer Settings menu allows you to customize the audio routing for each channel. You can choose the input source for every channel, assign channels to FX1 or FX2, and configure how each channel interacts with the crossfader. Available input sources include Engine DJ standalone playback, Bluetooth audio, computer audio from DJ software, and external line inputs all at once. Additionally, channels can be assigned to Crossfader Side A, Side B, or set to Thru to bypass the crossfader entirely.
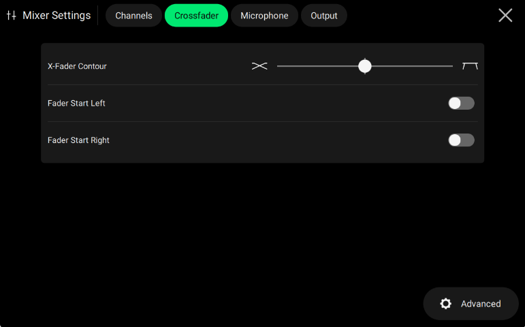
What crossfader settings are available on the PRIME 4 G2?
Crossfader Reverse swaps the left and right sides of the crossfader. Normally, the left side of the crossfader plays Channel A and the right side plays Channel B. When Reverse is enabled, these assignments are swapped, so the left side plays Channel B and the right side plays Channel A.
This feature is commonly used by performance and scratch DJs who prefer the opposite crossfader direction for their mixing style.
What recording quality does the PRIME 4 G2 support?
The PRIME 4 G2 records your performances in high-quality WAV or MP3 formats, allowing you to choose between maximum audio fidelity or smaller file sizes depending on your needs. Recordings are captured directly from the master output, making them ideal for reviewing mixes, sharing sets online, or creating promotional content.
Where are recordings saved on the PRIME 4 G2?
Recordings are saved directly to the storage device selected for recording. This can be a connected USB drive, SD card, or internal SSD (if installed). The recording destination is chosen when you start recording.
After recording has been stopped and saved, the file is stored in the Sessions folder on the selected storage device. You can access your recordings later from the PRIME 4 G2 media browser, within Engine DJ, or by browsing the drive on a computer.
Does the PRIME 4 G2 support microphone ducking?
Yes. The PRIME 4 G2 includes a Talkover (ducking) function for the microphone inputs. When enabled, the volume of the master audio is automatically reduced whenever someone speaks into a connected microphone, helping speech and announcements remain clear and intelligible.
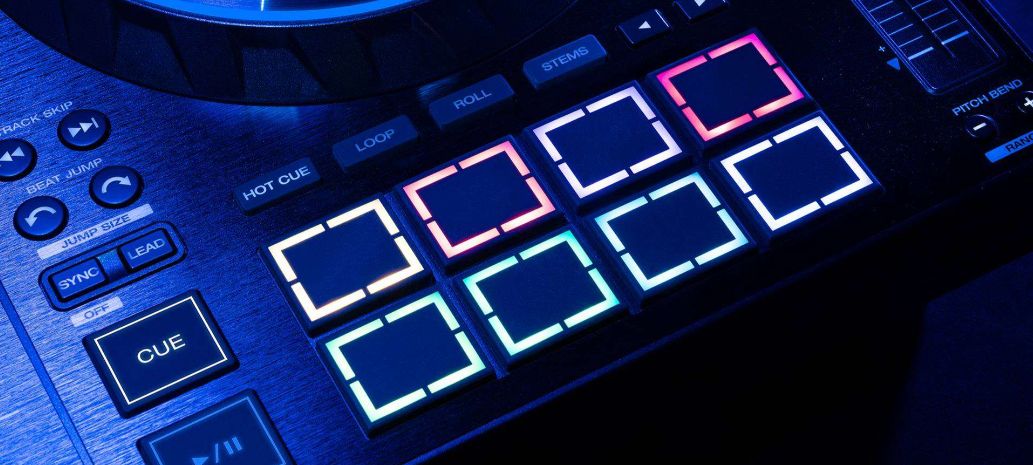
What can I do with the performance pads?
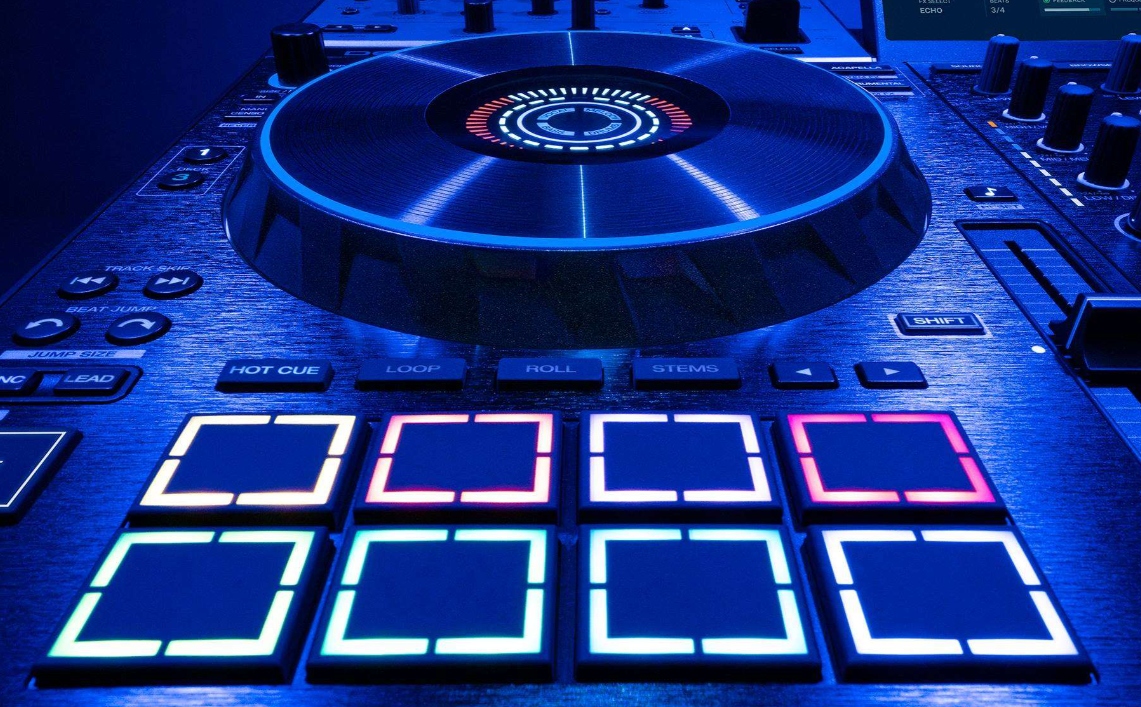
The eight performance pads on each deck have different functions in each pad mode. PRIME 4 G2 features eight
classic pad modes, six MPCe-capable pad modes, and five Engine Lighting-capable pad modes.
Pad Modes
- Hot Cue - In Hot Cue Mode, you can use each pad to jump to an assigned hot cue point. The location of set hot cue points and timing of triggered hot cue points will depend on the current Quantize setting, if enabled.
- Saved Loop Mode - In Saved Loop Mode, you can use each pad to enable an assigned loop. Pressing Loop for the first time will always enter Saved Loop Mode.
- Auto Loop - In Auto Loop Mode, you can use each pad to create and activate an auto loop.
- Roll Mode - In Roll Mode, you can press and hold each pad to trigger a “loop roll” of a certain length while the track’s timeline continues (in Engine OS, the lower half of the waveform in the display will continue moving forward). When you release the pad, the track will resume normal playback from where it would have been if you had never done anything (i.e. as if the track had been playing forward the whole time).
- Slicer Mode - In Slicer Mode, the eight pads represent eight sequential beats—“slices”—in the beatgrid.
- Slicer Loop Mode - Slicer Loop Mode operates the same as Slicer Mode, but the eight-slice phrase will loop.
- Sampler Mode- In Sampler Mode, you can assign and trigger up to eight samples using your performance pads.
- Stems Mode - Stems Mode is automatically included with PRIME 4 G2 hardware. Track stems can be created using the Engine DJ software and packed to an external drive for use with PRIME 4 G2.
MPCe Pad Modes
There are six available MPCe pad modes, utilizing the 3D-sensing pads for additional control options. These pad modes can all be selected using the Performance Pad selection menu, and some modes may be accessed using the hardware buttons.
The appearance of the pad in the Performance Pad selection menu icon in Performance View will indicate which areas of the pad can be used for controlling the selected mode. Some pad modes also have different LED colors for different pad areas.
- Filter Roll Mode - In Filter Roll Mode, you can use each pad to trigger a “loop roll” of a certain length and activate a low pass filter (left) or high pass filter (right) depending on which side of the pad is struck.
- Auto Loop Stems Mode - In Auto Loop Stems Mode, you can use each pad to jump to trigger an auto loop and activate the Acapella or Instrumental stem parts.
- Hot Cue Stems Mode - In Hot Cue Stems Mode, you can use each pad to jump to the assigned hot cue point and activate the Acapella or Instrumental stem parts.
- Hot Cue Roll Mode - In Hot Cue Roll Mode, you can use each pad to jump to the assigned hot cue point and trigger a roll at the same time.
- XY FX Mode - In XY FX Mode, you can use each pad to trigger XY effects.
- Roll FX Mode - In Roll FX Mode, you can use each pad to trigger a “loop roll” of a certain length, with or without a key change, as well as applying FX, depending on which pad and where it is struck.
Engine Lighting Pad Modes
There are five available pages of Engine Lighting pad modes which allow you to control various Engine Lighting parameters.
- Performance - In Performance Mode, you can use the pads to trigger performance overrides and adjust performance parameters. Press in the center of the top four pads to enable or disable the selected effect override. Use the left/right XY pad control to adjust the parameter amount.
- Color/Position - In Color & Position Mode, you can use the pads to activate color and position overrides.
- Autoloop Controls - In Autoloop Controls Mode, you can use the select auto loop banks, play autoloops, move to the previous or next autoloop, repeat the current autoloop, and override scripted tracks.
- Autoloop Select - In Autoloop Select Mode, you can use the pads to select autoloops from the current bank.
- Static Look Select - In Static Look Select Mode, you can use the pads to select static looks.
SoundSwitch and Engine Lighting

One of the standout features of the PRIME 4 G2 is its built-in integration with SoundSwitch lighting control, allowing the unit to automatically synchronize compatible lighting effects to your music without needing a laptop. The PRIME 4 G2 platform supports DMX lighting control directly from Engine DJ OS.
Use a standard 3-pin XLR DMX cable to connect this lighting control output to DMX lighting interface or fixture. You can use the built-in Engine Lighting mode to control connected lighting fixtures.
Built-in DMX Interface (Isolated) | Direct control of DMX lighting systems without external hardware 1 Universe (512 channels) |
Onboard Smart Lighting | Philips Hue Nanoleaf |
Supported DMX
| SoundSwitch DMX Micro SoundSwitch Control One |
DMX Lighting Setup
You connect a supported SoundSwitch DMX interface (typically a SoundSwitch Micro DMX Interface) to the PRIME 4 G2. The interface then connects to your lighting fixtures via standard DMX cabling.Using SoundSwitch software on a computer beforehand, you:
- Add your lighting fixtures.
- Set their DMX addresses.
- Arrange them in your lighting venue.
- Save the project to your Engine DJ media. (General SoundSwitch workflow.)
The SoundSwitch project is exported to the same USB drive, SD card, or storage device that contains your music library.
When tracks that have SoundSwitch lighting data are loaded and played, the PRIME 4 G2 automatically sends DMX commands through the connected interface, keeping the lighting in sync with the music.
Engine Lighting
The Engine Lighting page allows you to control connected lighting devices such as DMX fixtures and Smart Lights using SoundSwitch to seamlessly sync your music and lights.
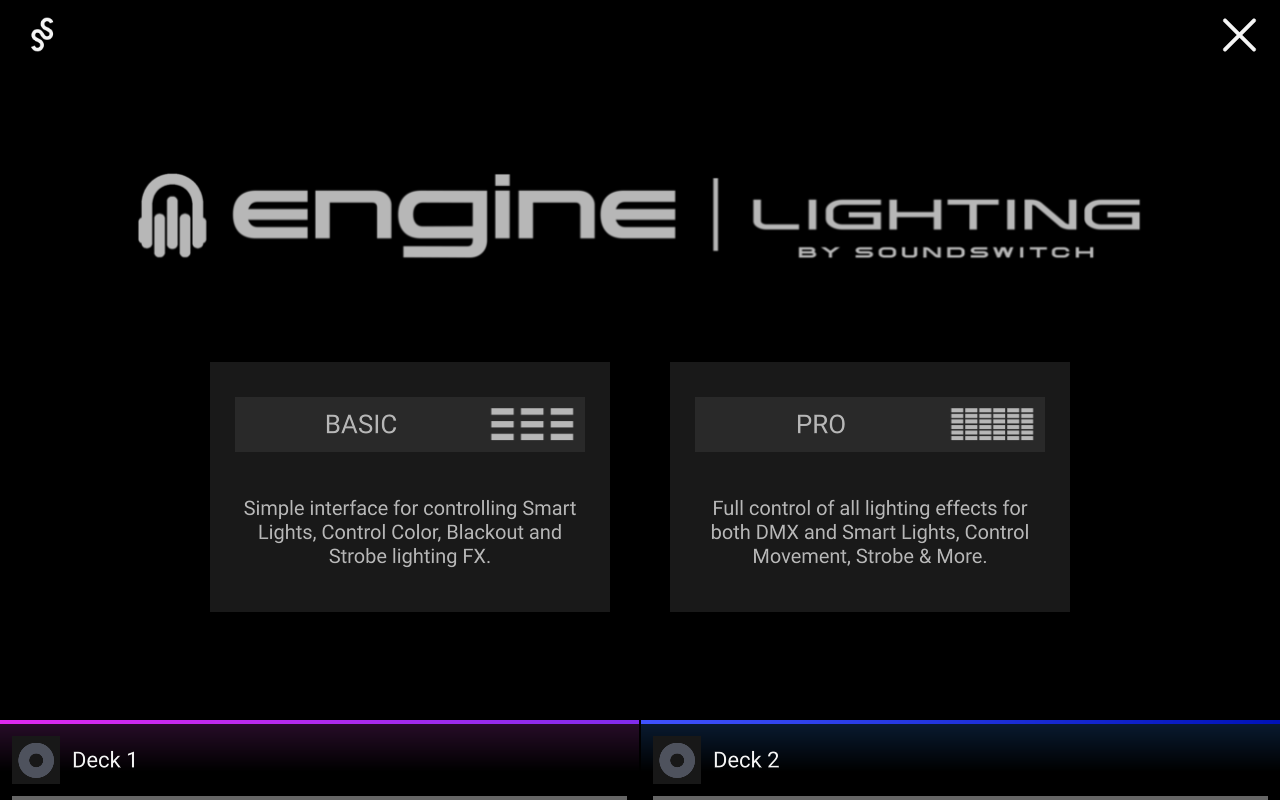
The first time you use Engine Lighting, you can select a Basic or Pro layout for performing:
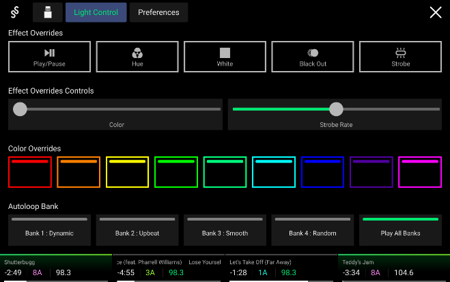
- Basic: A simple interface for controlling Smart Lights, Control Color, Blackout and Strobe Lighting FX.
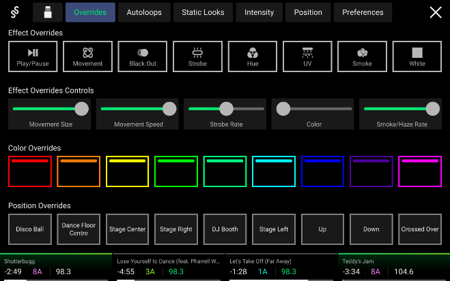
- Pro: Full control of all lighting effects for both DMX and Smart Lights, Control Movements, Strobe and more
Basic:
Pro:
How many DMX universes does the PRIME 4 G2 support?
Engine Lighting supports a maximum of 2 DMX universes.
If you are using the PRIME 4 G2's built-in DMX output, that built-in port provides support for the first universe. You can then connect a SoundSwitch Micro DMX Interface to add a second universe, giving you the maximum supported total of 2 universes.
If you connect a SoundSwitch Control One (C1), Engine Lighting will prioritize the C1's DMX outputs and disable the built-in DMX output. In this configuration, the C1 becomes the active DMX interface and provides access to the supported universes through the C1 rather than the device's onboard DMX port.
Should I use a SoundSwitch Control One or a Micro DMX Interface with a PRIME 4 G2?
If your primary goal is simply to gain access to a second DMX universe (more than 512 DMX channels), adding a SoundSwitch Micro DMX Interface is generally the recommended option.
The PRIME 4 G2 features MPCe performance pads that provide many of the hands-on lighting controls that users would typically access through a Control One, such as triggering Autoloops, Scripts, Static Looks, and other Engine Lighting functions. For many users, simply adding a Micro DMX to the PRIME 4 G2 may offer the desired functionality.
Since Engine Lighting supports a maximum of 2 DMX universes, you can achieve the full supported capacity by using:
- ✅ Built-in DMX Output (Universe 1)
- ✅ Micro DMX Interface (Universe 2)
This provides up to 1,024 DMX channels in total while maintaining use of the device's onboard DMX output.
While the Control One remains an excellent choice for users who want dedicated lighting controls and tactile operation, it is not required to expand beyond a single DMX universe with the PRIME 4 G2.
Effects
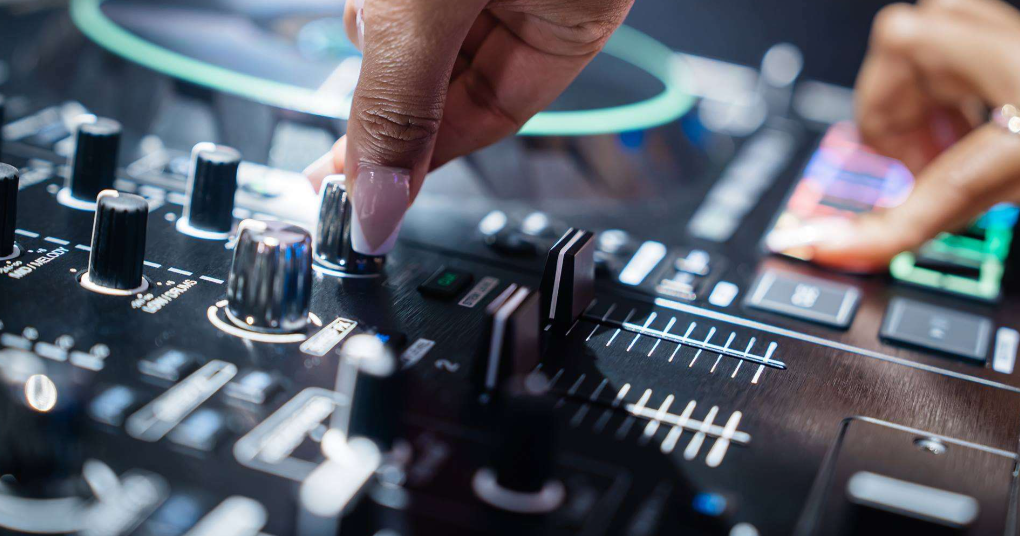
PRIME 4 G2 features built-in, time-based effects that can be selected and controlled using your hardware or touchscreen interface.
What Main FX are available on the PRIME 4 G2?
The PRIME 4 G2 features 26 built-in BPM-synchronized effects, including Echo, Delay, Reverb, Flanger, Phaser, Roll, Ping Pong, BeatBreak, Backspin, Brake, Crush, and many more. These effects automatically sync to the BPM of analyzed tracks, allowing DJs to create seamless transitions, dramatic buildups, and performance-focused sound design directly from the hardware.
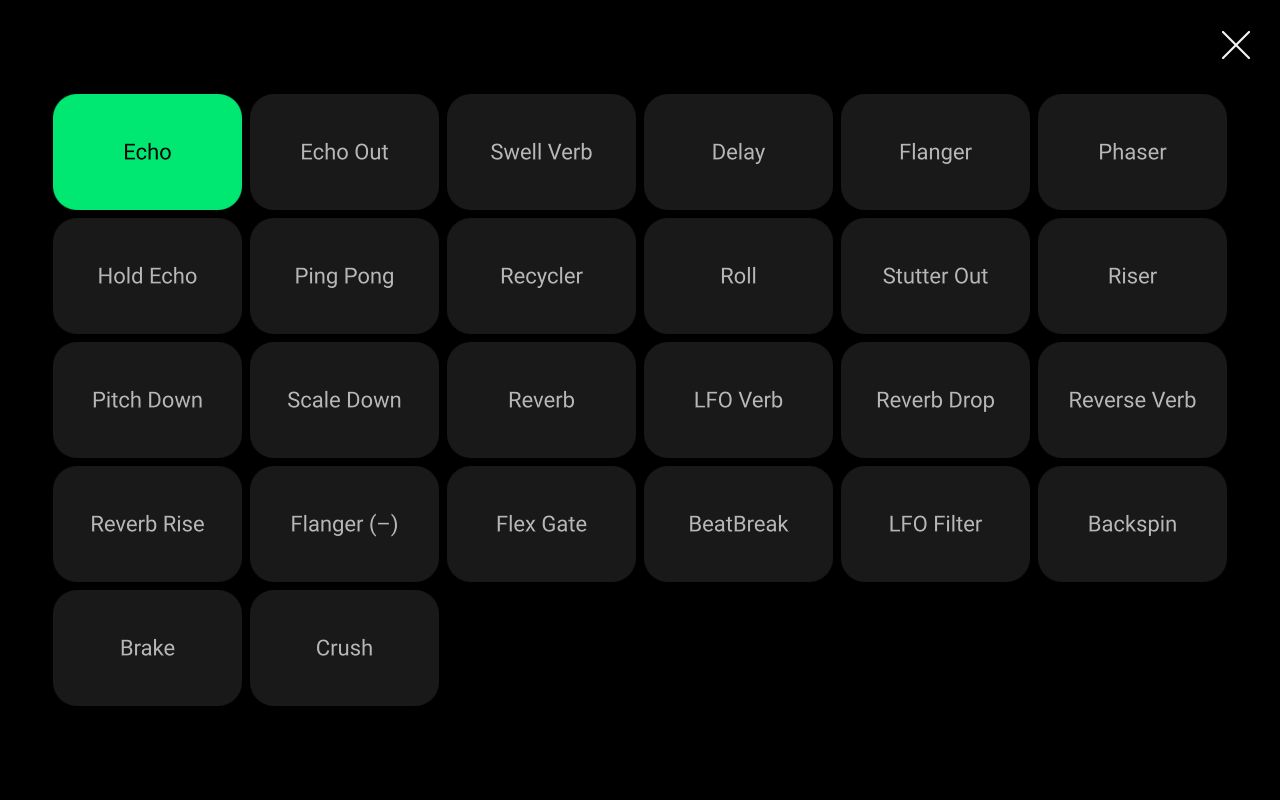
- Echo
- Echo Out
- Swell Verb
- Delay
- Flanger
- Phaser
- Hold Echo
- Ping Pong
- Recycler
- Roll
- Stutter Out
- Riser
- Pitch Down
- Scale Down
- Reverb
- LFO Verb
- Reverb Drop
- Reverse Verb
- Reverb Rise
- Flanger (−)
- Flex Gate
- BeatBreak
- LFO Filter
- Backspin
- Brake
- Crush
Sweep FX
The Prime G2 features a Filter, Noise, Wash and Reverb which can be apply to all channels on the device when engaged.
- Filter: This effect applies a filter to the channel. Starting from the center (12:00) position, turn a Sweep FX knob counter-clockwise to apply a low-pass filter, or turn it clockwise to apply a high-pass filter.
- Noise: This effect adds noise to the signal. Starting from the center (12:00) position, turn a Sweep FX knob counterclockwise to add pink noise, or turn it clockwise to add white noise.
- Wash: This creates a transition effect. Turn a Sweep FX knob to its most counter-clockwise (minimum) position to apply a 1-beat echo that will also mute the channel’s normal audio signal, or turn it to its most clockwise (maximum) position to apply a 1/2-beat echo.
- Reverb: This effect applies reverb to the signal. Turning the Sweep FX knob clockwise or counterclockwise from the center (12:00) position increases the room size of the reverb effect. Turning to the left lowers the pitch of the reverb, while turning to the right increases the pitch.
To use Sweep FX, turn the Sweep FX knob for the desired deck clockwise or counterclockwise.
Fader FX
Fader FX are performance effects that are triggered by moving the channel faders, the crossfader, or both. Rather than turning an effect on with a button, the effect is activated as part of your mixing movement, making transitions faster and more expressive.
- Fader Echo: This effect applies a short echo when the faders are moved.
- Echo Down: This effect applies a short echo with a pitch down effect when the faders are moved.
- Stutter Verb: This effect applies a stutter effect with reverb when the faders are moved.
- Reverb Down: This effect applies a wind down effect with reverb when the faders are moved.
- Use the Trigger setting to determine whether Fader FX are triggered when moving the Crossfader, Channel Faders, or Both.
- Use the Disarm After Trigger setting to determine whether Fader FX is automatically disabled after it is triggered, or if it remains enabled.
Touch FX
The PRIME 4 G2 features 10 built-in Touch FX that can be controlled directly from the touchscreen: LFO Echo, Filter Roll, Filter Echo, Filter Dub Echo, Filter Gate, Noise Gate, Filter Reverb, Flanger, LFO Filter, and Filter. Each effect uses the touchscreen XY pad to control multiple parameters simultaneously, making it easy to create dynamic buildups, transitions, and performance effects with a single touch. Touch FX can be applied to an individual deck or to the master output.
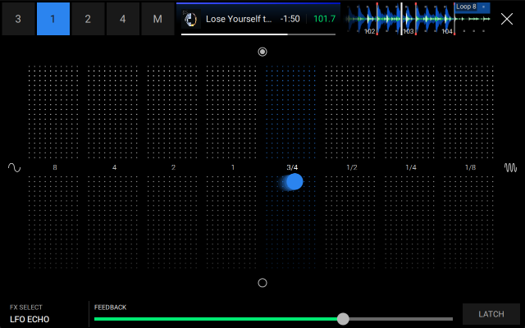
- LFO Echo
- Filter Roll
- Filter Echo
- Filter Dub Echo
- Filter Gate
- Noise Gate
- Filter Reverb
- Flanger
- LFO Filter
- Filter
Are Main, Touch, and Sweep FX available for line/phono inputs?
Sweep FX
Sweep FX can be applied to audio from external line and phono sources connected to the PRIME 4 G2's mixer channels. This allows you to use effects such as Filter, Noise, Wash, and Reverb on connected turntables, media players, and other external audio devices.
Main FX
BPM FX can be assigned to external inputs; however, external line and phono sources do not provide analyzed BPM or beat-grid information. As a result, beat-synchronized effects may not function in the same way as they do with Engine DJ tracks, and some effects may require manual adjustment for optimal results.
Touch FX
No. Touch FX are only available for audio played through the PRIME 4 G2's internal digital decks and supported software integrations. They cannot be applied directly to external line or phono inputs
Utility and Miscellaneous
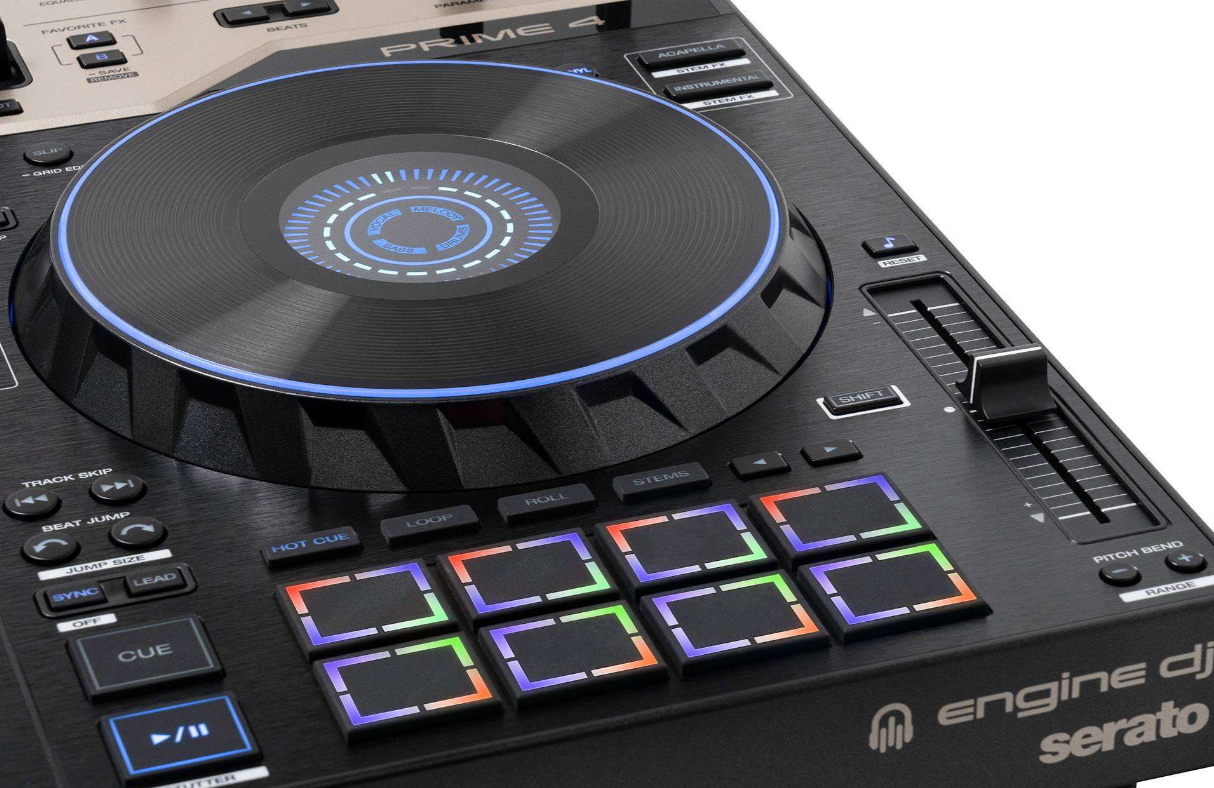
How much does the PRIME 4 G2 weigh and what are the dimensions?
- Weight: 21.83 lbs. / 9.9 kg
- Dimensions: 30.00” x 19.57” x 4.13” / 76.20 x 49.71 x 10.49 cm
Does the PRIME 4 G2 have an auto-switching power supply?
Yes. The PRIME 4 G2 features an internal auto-switching power supply, so it can automatically operate from 100-240V AC, 50/60Hz without requiring a manual voltage selector. This means you can use it internationally by simply using the appropriate mains lead or plug adapter for the country you're visiting
Power Supply
- Input Type: IEC
- Input Voltage: Input Voltage | 100–240 VAC
- Frequency: 50/60hz
- Power Consumption: 100 W
Are any cases available for the Prime 4 G2?
Most major manufacturers will offer support at launch or shortly thereafter. Contact your favorite authorized dealer for more information.
Was this article helpful?
That’s Great!
Thank you for your feedback
Sorry! We couldn't be helpful
Thank you for your feedback
Feedback sent
We appreciate your effort and will try to fix the article