Akai Pro MPC Series | Optimizing Your MPC's Internal Storage
This support article will cover the basics of MPC maintenance and guide you through clearing out any unwanted project data files that are taking up space in your internal memory.
TABLE OF CONTENTS
Backing Up
Before removing files from the internal drive, we recommend backing-up any files or projects data files of importance to you. Once these projects are deleted, they are not accessible and will no longer be available at a later time, so make sure you back this data up first.
Removing User Files
Removing User Projects
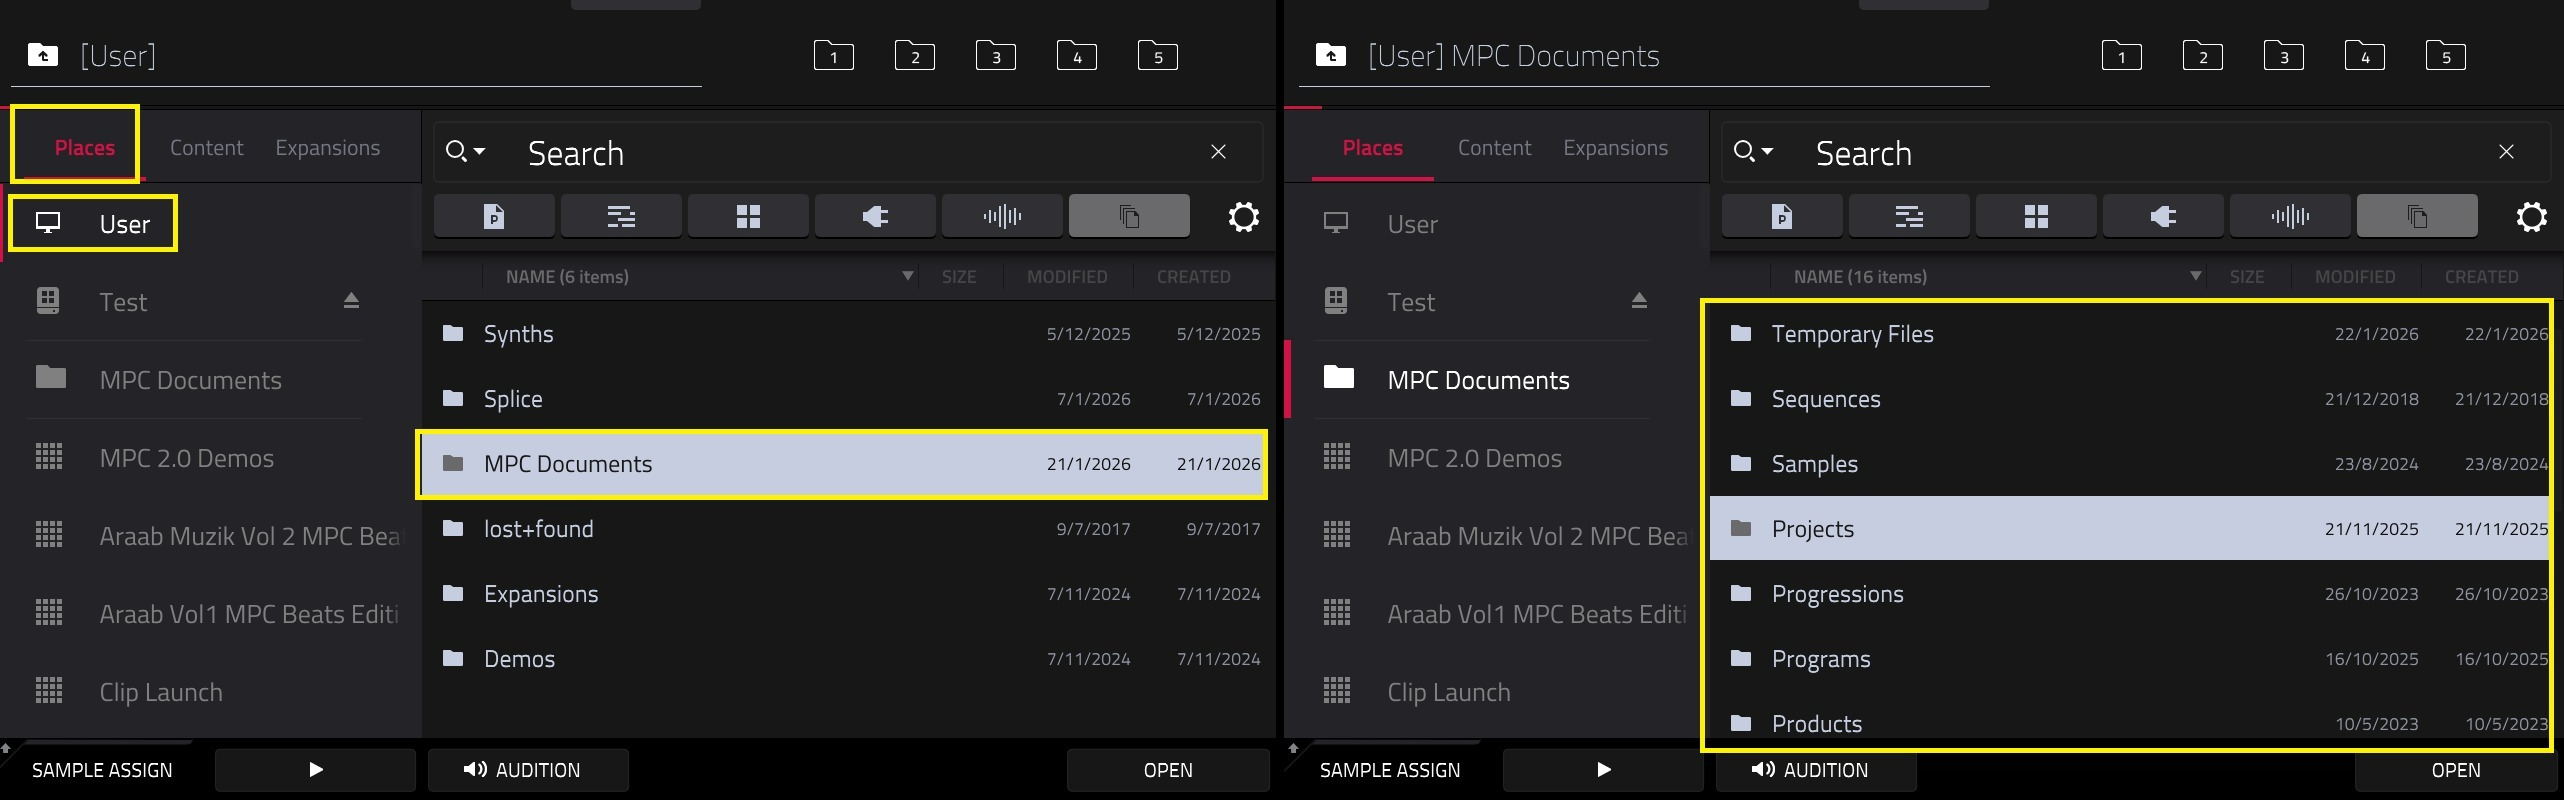
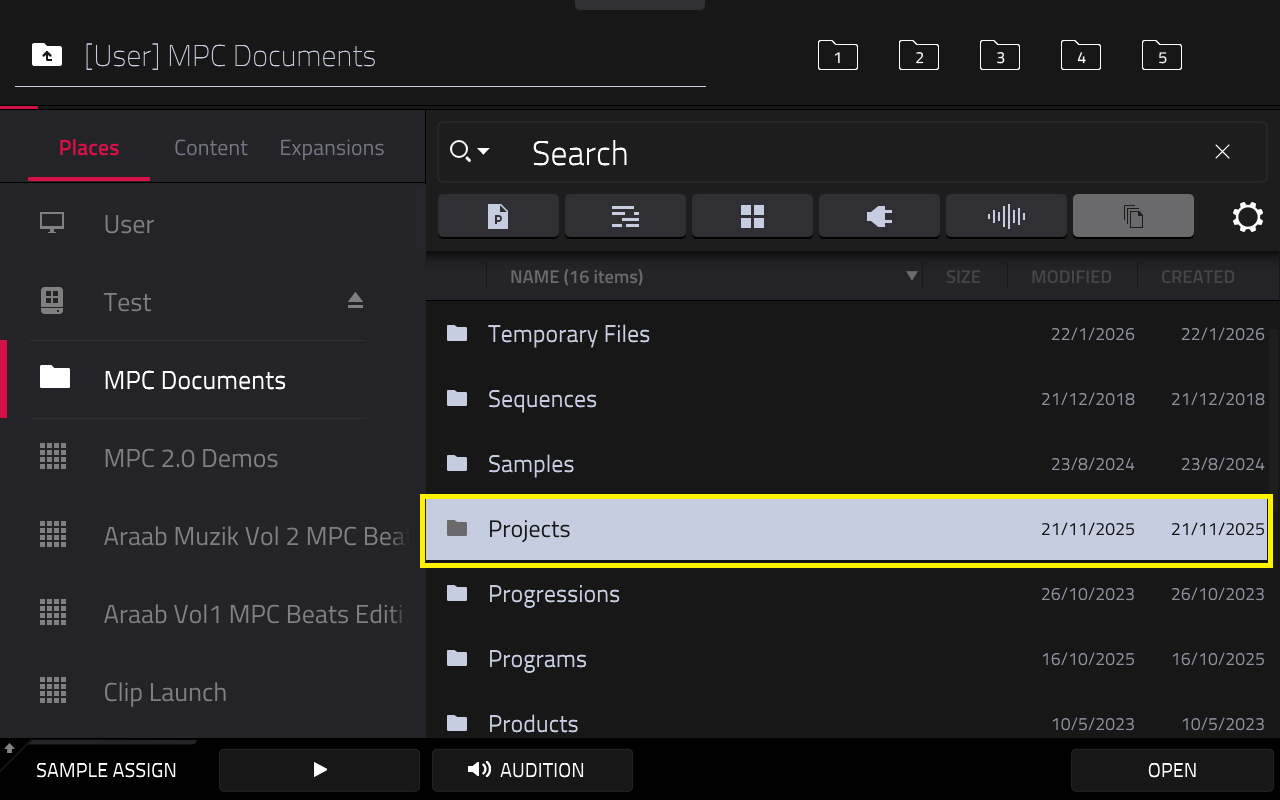
When you save a file, the MPC defaults to Browser > Places > Internal/User > MPC Documents > Projects
If you have user projects that you wish to remove, please follow the steps below
1. Tap Menu on your MPC Hardware > Browser
2. Tap on the Gear Icon at the right hand side of the browser filters:


4. Select the ‘3-pages filter'. This will show all file types and the BROWSER will now display all the MPC project (.xpj) and the ‘hidden’ MPC ProjectData folders:
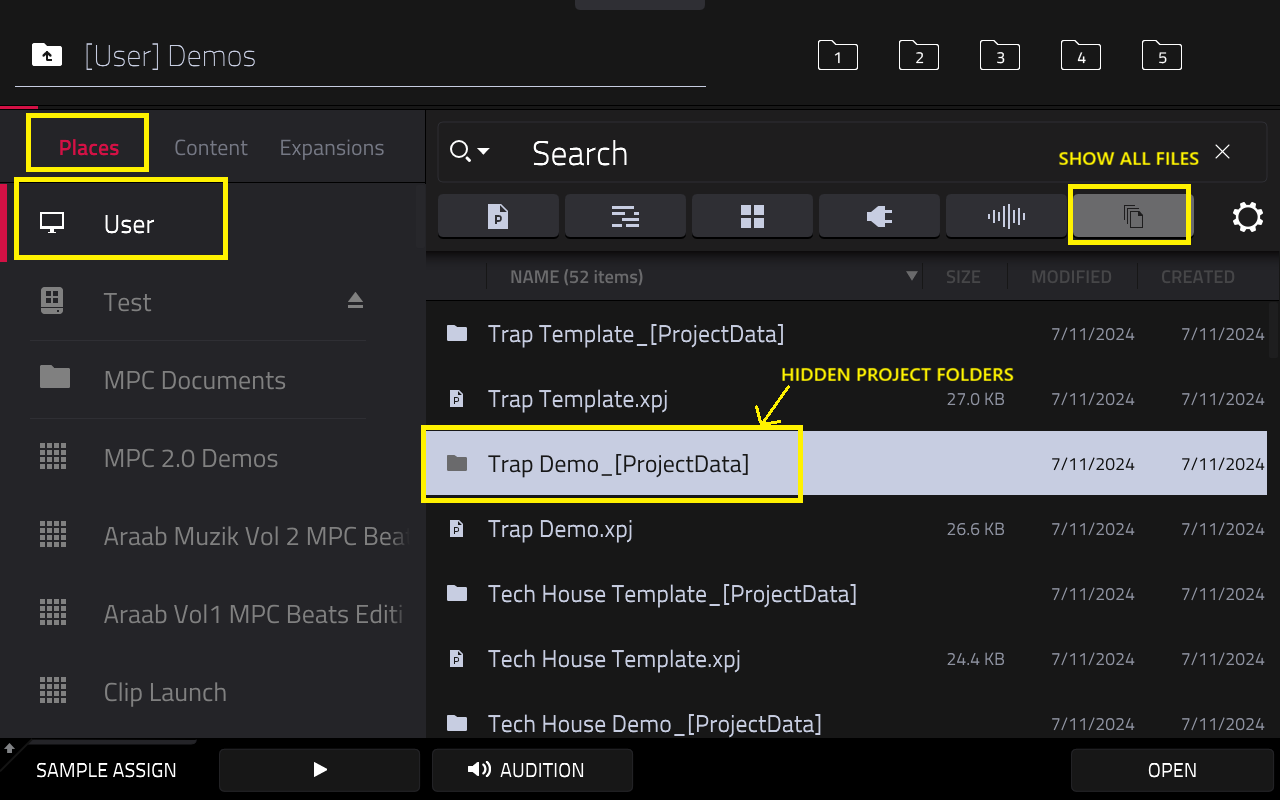
5. To remove these folders or files, hold Shift on your MPC and tap "Delete"
Removing Splice Folder
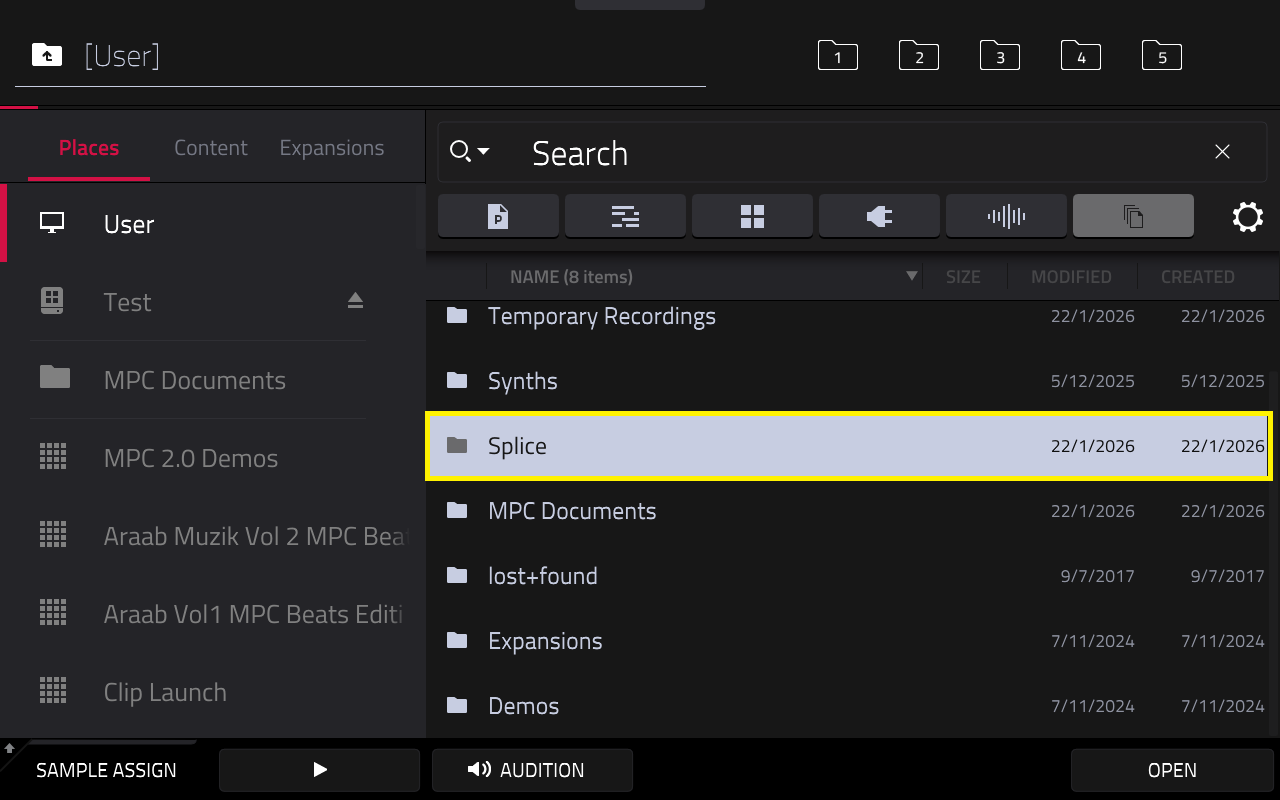
1. Check for the Splice folder on the Internal Drive via Places > Internal/User.
2. If there is a Splice folder there, you can delete it by pressing the Shift button and Tap Delete (on screen)

2. The MPC will ask you to configure the Splice drive.
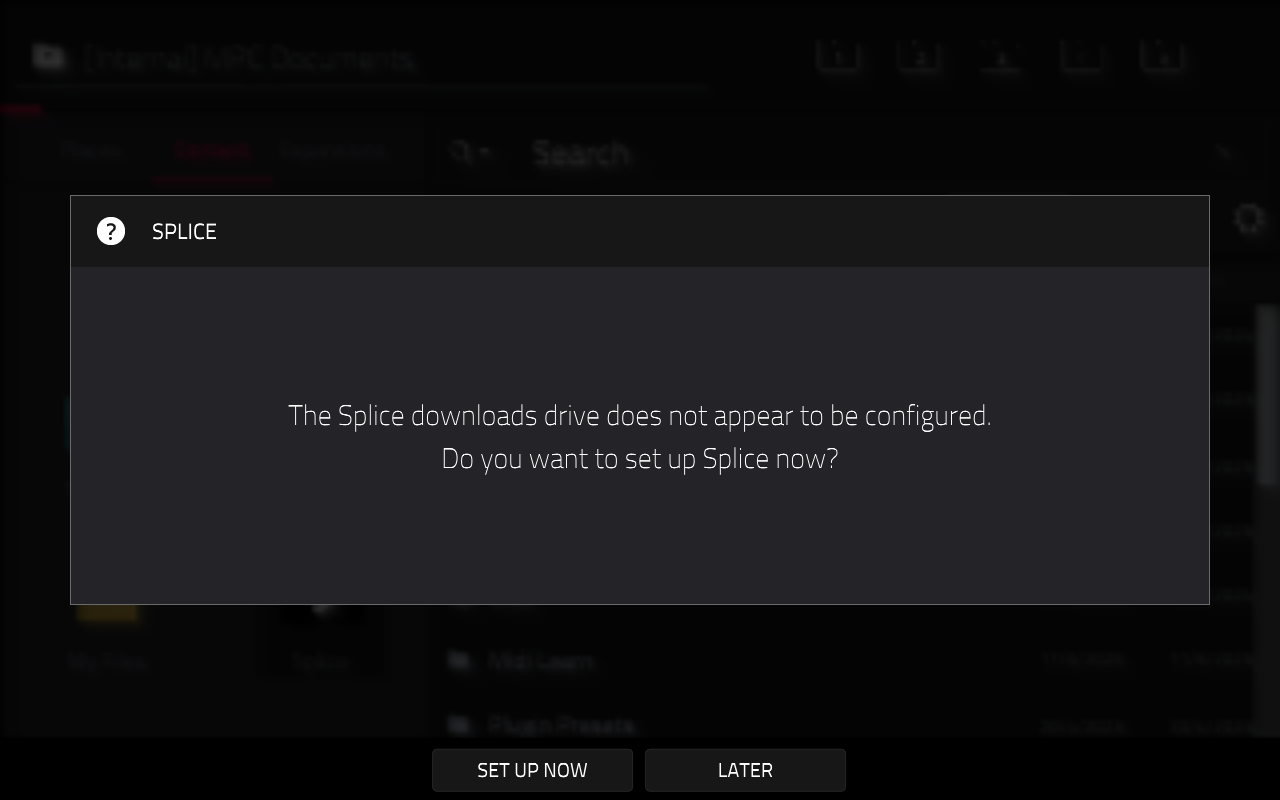
3. Tap Set Up Now and select a drive by tapping Change
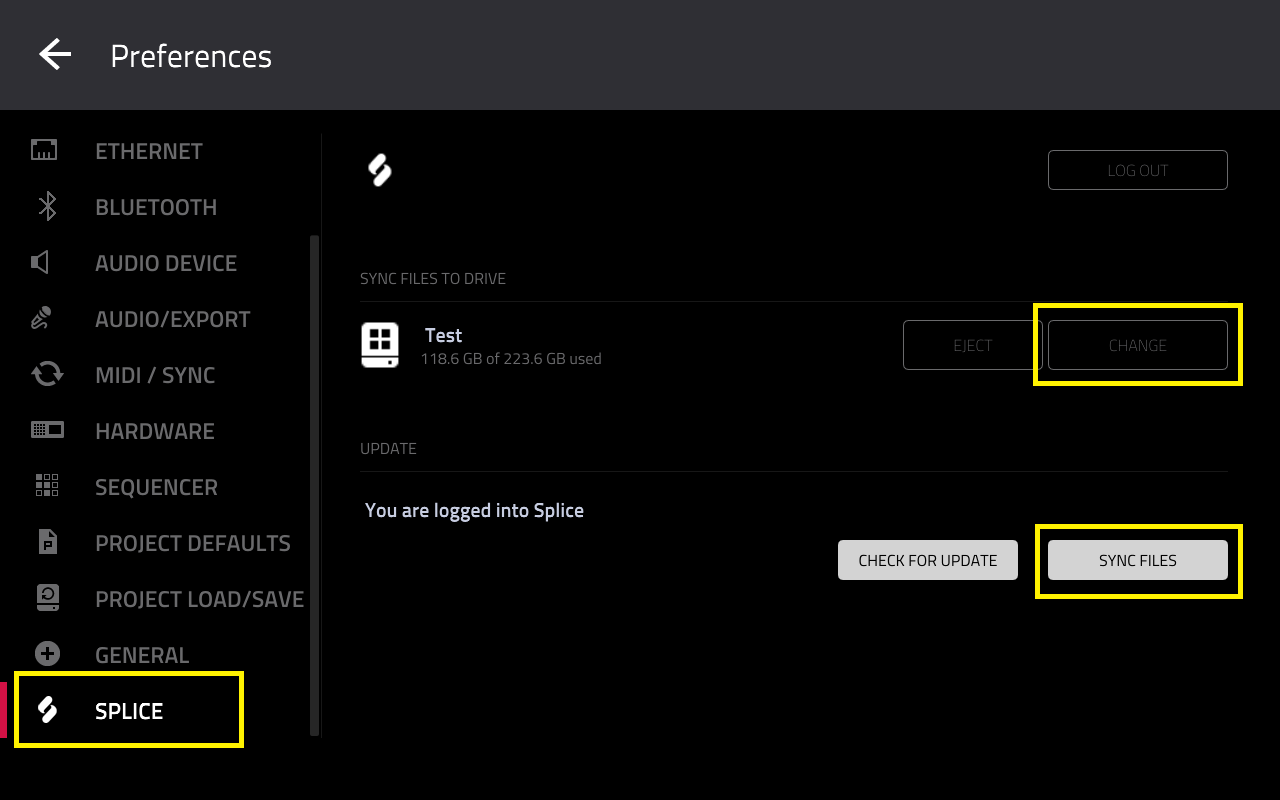
Once done, tap on Sync Now. Your Splice files should then be available on your new drive, and your samples will be organized in categorized folders.
More tips on managing Splice can be found at Akai Pro MPC Series | Splice Troubleshooting
Removing Synths Folder
The Synths folder contains the data/files for all plugins that have been downloaded to the MPC. This folder can be deleted and/or assigned to another drive (SSD, SD card or USB drive)
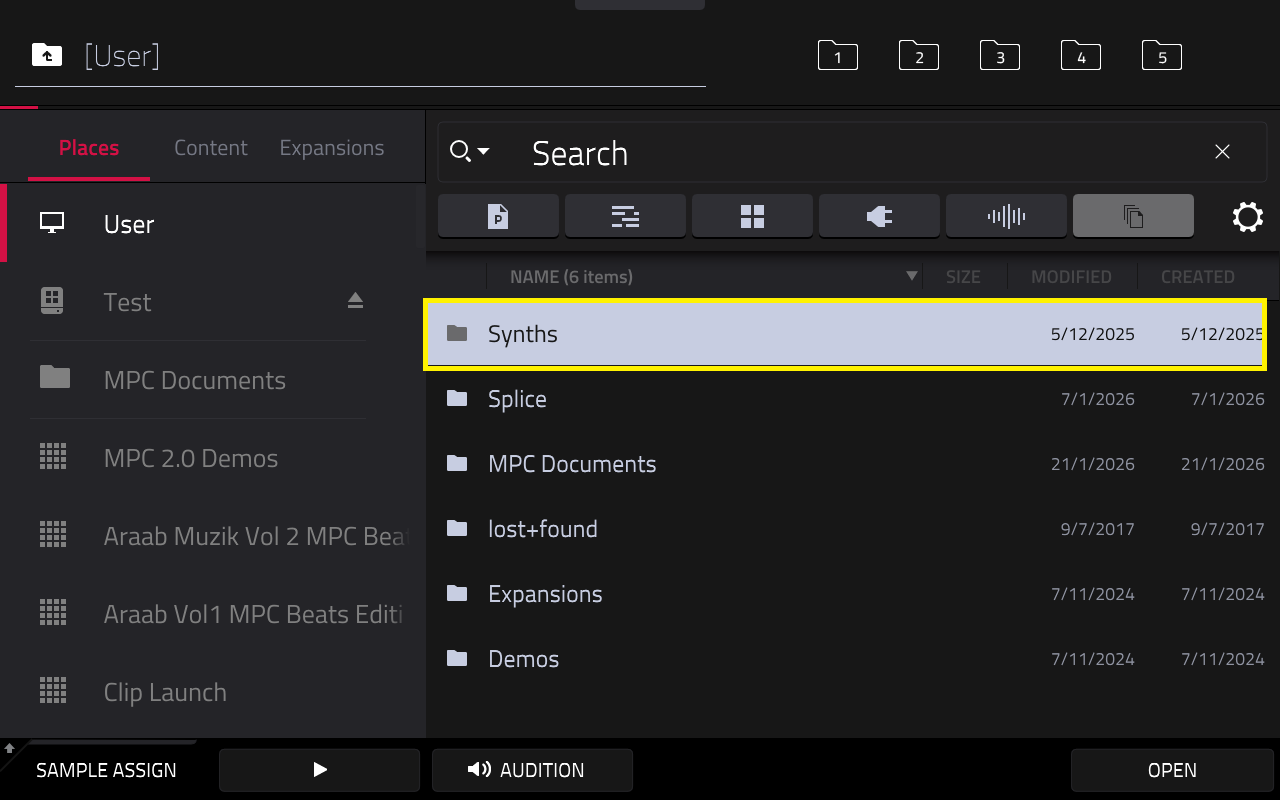
1. Check for the Synths folder on the Internal Drive via Places > Internal/User.
2. If there is a Synths folder there, you can delete it by pressing the Shift button and Tap Delete (on screen)
Once this has been done, perform the following steps in order:
Note: Your user drive will need to be permanently connected to your MPC when activating and installing your plugins.


More tips on managing the Synths folder can be found at MPC Series | Managing Plugins
Was this article helpful?
That’s Great!
Thank you for your feedback
Sorry! We couldn't be helpful
Thank you for your feedback
Feedback sent
We appreciate your effort and will try to fix the article